After living for years in traditionally scaled homes, we sold our last house and moved to an apartment to try living in a smaller footprint. We didn't miss the space, we loved ditching our mortgage and we found ourselves firmly on the path to living more sustainably.
We finished this house and moved in about 15 months ago. People late to our story have asked about our build, so I figure it's time for a retrospective.
We finished this house and moved in about 15 months ago. People late to our story have asked about our build, so I figure it's time for a retrospective.
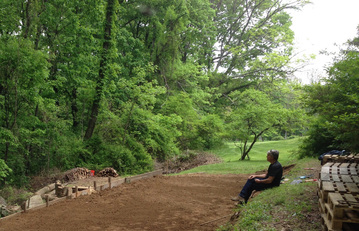
Site prep. We were fortunate enough to have a friend invite us to build on a corner of her 5-acre property in the Blue Ridge mountains. We cleared and leveled (or partially leveled) a site for our house, with enough room to build a separate screen house which went up first. (More on the screen house here.) We scavenged old boards and used them to build a retaining wall, then reinforced the wall with stones from the woods.
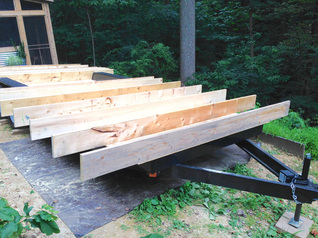
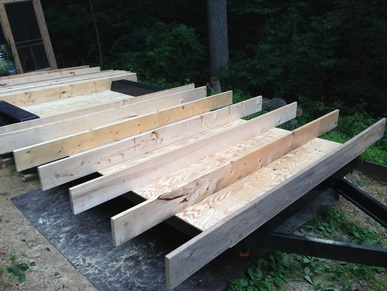
The trailer. Zoning doesn't allow a second foundation-built house on the property, so we built on a trailer. Ours is on a 24-foot equipment trailer from Tiny House Builders of Georgia. Our design runs the full 24' of the trailer and extends over the bed two feet on both sides. We used 10" joists to raise the floor over the wheel wells; it also left us plenty of room for insulation). Bill drilled holes through the trailer to attach the joists and bottom layer of plywood with 6" lag screws.
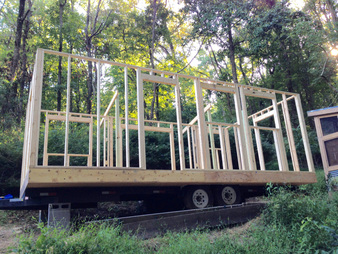
Framing. We went with a "stick built" house on 24" centers (sometimes referred to as advanced framing). The technique saved us a little money (by using less wood) and reduced the house's overall weight. We designed the framing in about 8-foot sections so that it would be easy for the two of us to lift pieces into place and attach them. We put up four 4x4" posts to carry the weight of the roof, since we decided to go with a split roof design that incorporated clerestory windows.
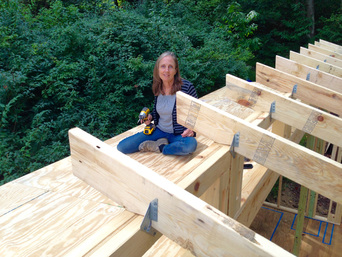
Roof. After a couple months of tarping the build site for rain, we were thrilled to roof the house. We installed a beam and framing for the row of clerestory windows between our two rooflines, then hung rafters and screwed down plywood decking. On top of the plywood, we went with a layer of WeatherWatch instead of roof felt for more leak resistance. On top of that went panels of corrugated steel fastened using screws with rubber washers. Bill bent the flashing out of strips of galvanized steel.
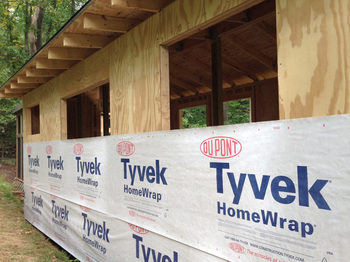
Sheathing and house wrap. Plywood installed on the exterior studs made our build look more like a home. After cutting out the spaces for our windows and doors, we swathed the house with Dupont Tyvek HomeWrap. We'd talked about adding a rain screen which would leave a gap of air between the house wrap and the siding yet to come...but we forgot. Rainscreen helps control moisture. (You can read more about it here, for more information.) So far, so good here without the rainscreen.
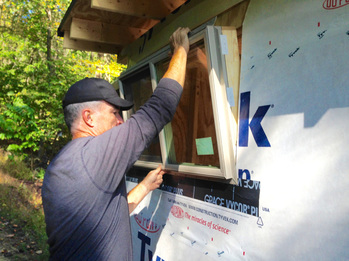
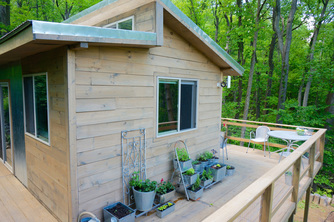
Windows and doors. We knew we wanted a lot of light and cross ventilation (no air conditioning) in our house. We looked at second-hand windows, but finally decided we didn't want to take the time to scavenge the exact sizes we wanted. The best deal we found was for Jeld Wen windows and doors at a local lumber yard. We made a last-minute decision to swap out one window for a third door when we thought about building a deck. So, 11 windows and three glass doors it was.
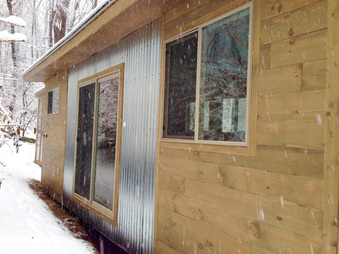
Siding. We wanted to break up the sides of the house by using wood and metal siding. Our final choices: corrugated steel (same as the roof) and wood clapboard (stained the same color as the screen house). Snow came before we could finish the siding, and eventually our progress crawled to a stop. We took a few months off and finished the last side and the eaves of the house in the spring. We started the eaves with super light-weight panels, but switched to thicker plywood by the end.
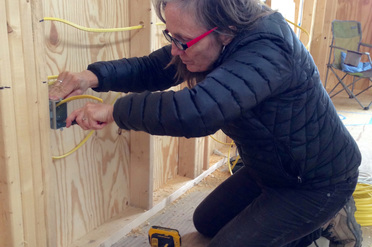
Wiring. Our electrical plan got a little complicated when we decided to go solar as much as we could afford. We found a solar generator (the SolMan classic by Sol Solutions), and Bill designed the wiring to go to two boxes. All the lights and most outlets are wired to a box powered by our generator. The hot water heater, water pump, microwave and back-up heater—all items that need surges of power—use grid power drawn from our friend's house.
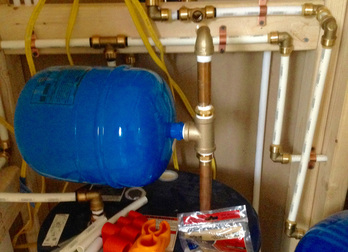
Plumbing. A mountain spring feeds the cistern that supplies water to our friend's house. We tap into that supply. We went with PEX water pipes because PEX is flexible, inexpensive and easy to work with. Bill watched YouTube videos to figure out the little he didn't already know. As far as waste pipes go, we're careful about everything that goes down our drains so it can be piped to a mulch pit. We're not on septic, so urine also goes to its own pit. We deal with solid waste by composting it.
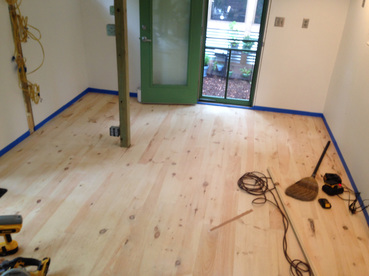
Insulation, walls and floor. With the electrical and plumbing installed, we insulated between the ceiling rafters with rigid foam and between the wall joists with EcoTouch Fiberglas. The walls went up fairly quickly with standard drywall; the ceiling is light-weight (too light-weight) beadboard panels. We painted the walls and ceiling white, knowing we would have dark wood floor and trim For the floors we found a good deal on pine boards at Lumber Liquidators, then stained them with the same color as the exterior house.
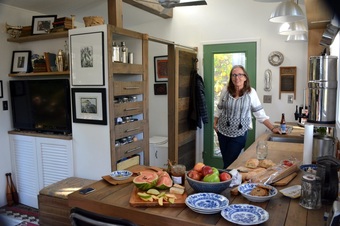
Kitchen, bathroom and bedroom. We built interior walls to divide our space for a bathroom on one end of the house and sleeping space on the other. The interior bathroom wall also houses the water heater, plumbing, electrical, a medicine cabinet and the pantry. Both walls stop short of the ceiling for air flow and light. We went with a big sink, undercounter fridge, alcohol-burning stove, butcher block counters and IKEA cabinets in the kitchen. Besides the DIY composting toilet, the bathroom houses a mini sink and a metal-lined shower.
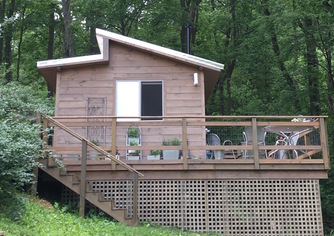
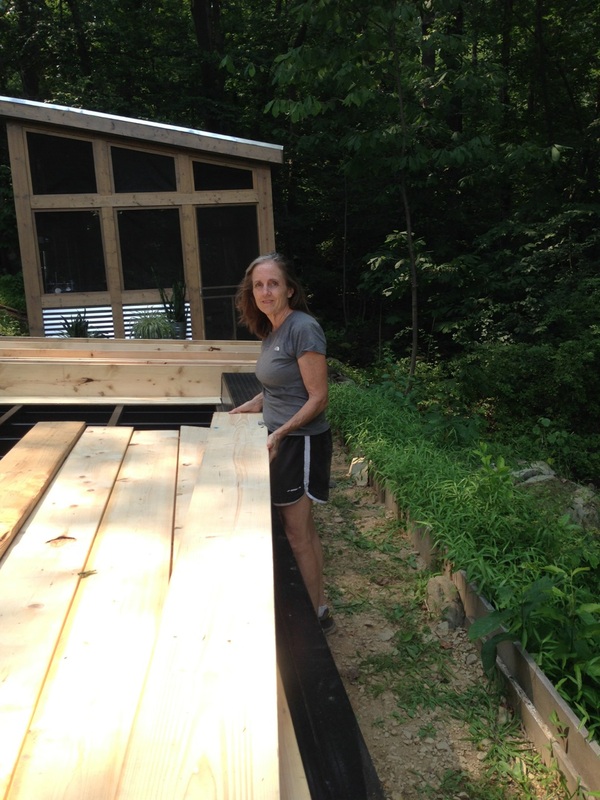
Deck. Most of the deck went up after we moved in. It wraps around three sides and makes it much easier to walk around the house, especially important given our sloped mountain site. The deck also gives us plenty of room for grilling and dining, growing herbs and having friends over. We've planted grapes and hope they'll grow up the lattice that hides the trailer from view. Still to come: planters outside the big glass sliding door.
A year after we started our build, we moved in. We finished the deck seven months after that. There's much I've skipped (the wood stove install, for example), so let us know if you have questions about the steps I've passed over here. (Or the steps I included!)


 RSS Feed
