Simply Enough
  • Building
  • Projects
  • Simply Enough
  • Community
  • Contact
  • Products
  • About Us
  • Media

Big Ideas,
a Tiny House
And Simple Living

Kitchen Storage Redux

8/17/2017

1 Comment

 
Picture
We've gotten a few questions recently about cooking in our tiny house kitchen. Actually, the questions are more about whether there's room for kitchen sundries and dishes and silverware, etc. than actual cooking.

I'm happy to say that we have more than enough room for every pot and pan, every dish, every can and cereal box we want. After two years of full-time living in the house, we continue to shed things we don't use—not because we don't have space, but because living is easier when the excess get cleared out.

Below are some of our kitchen storage solutions. We'd love you to add questions/comments below to keep the conversation going.

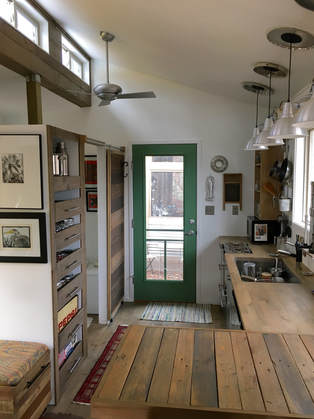
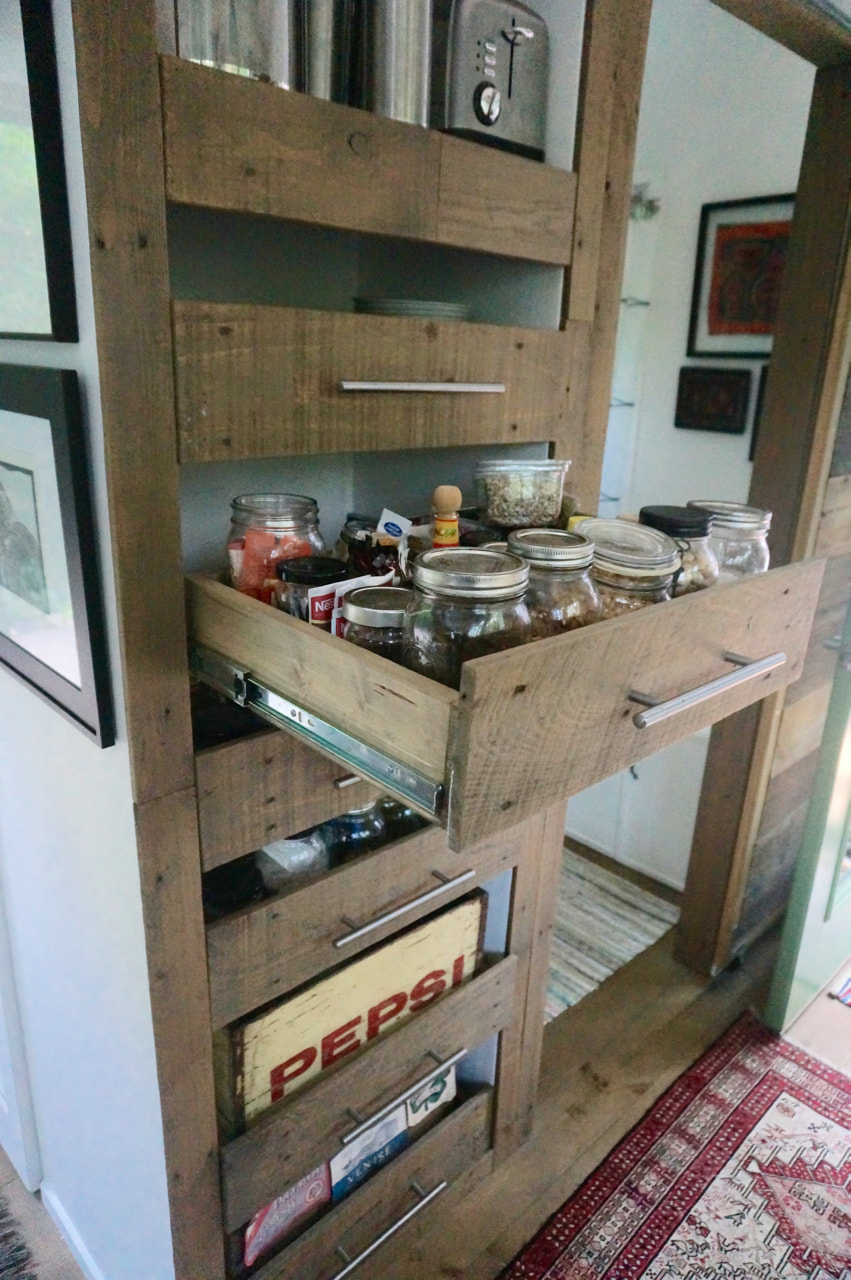
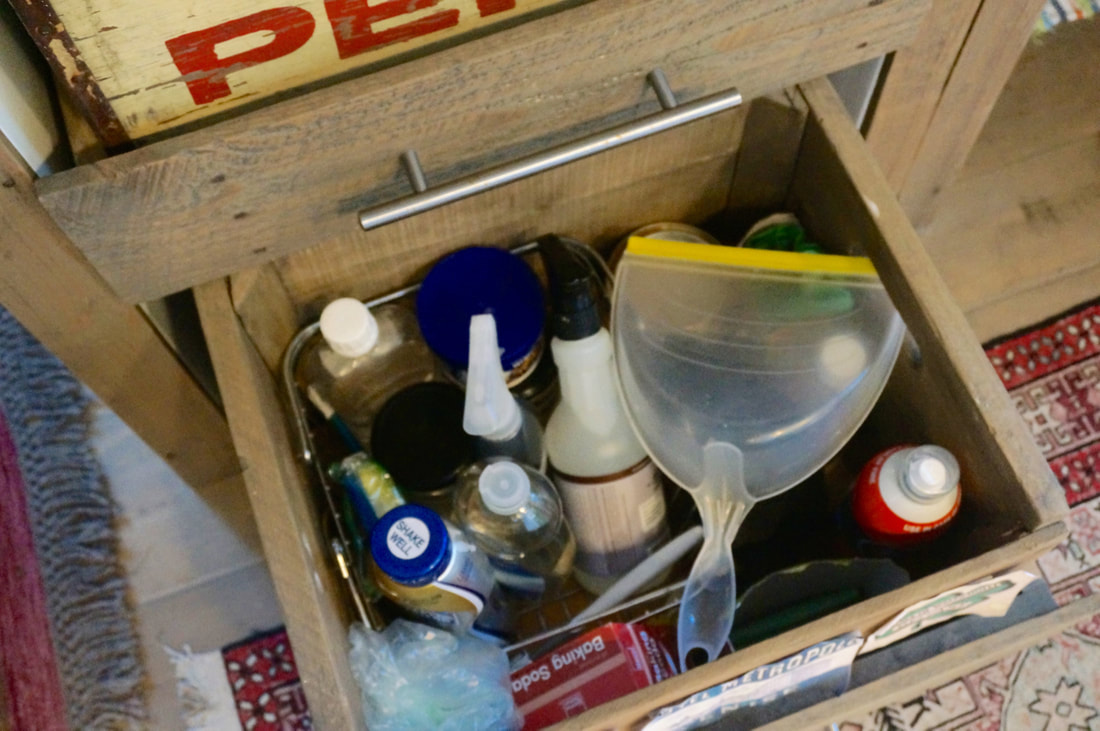
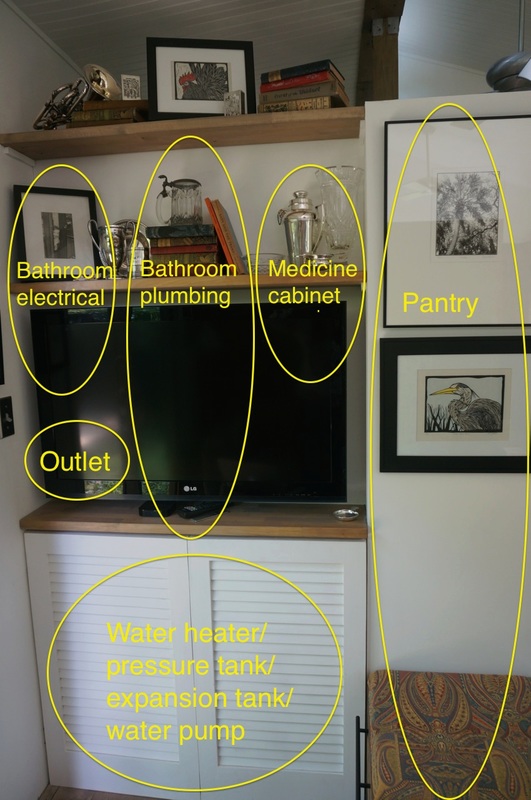
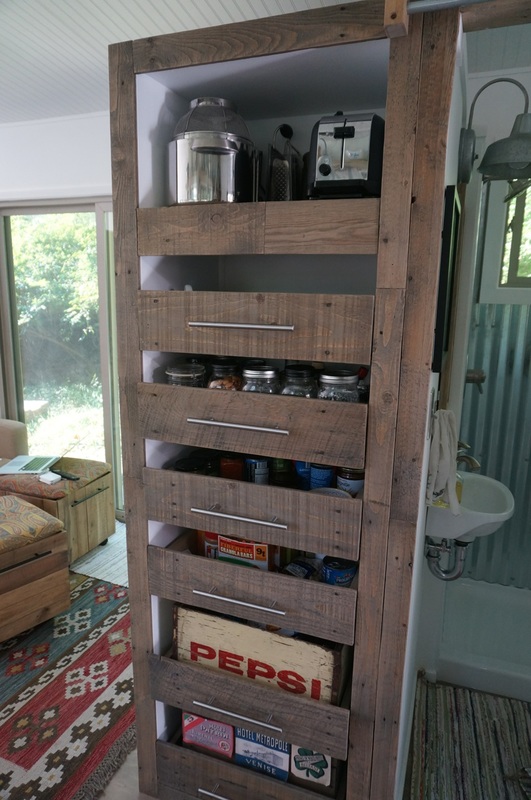
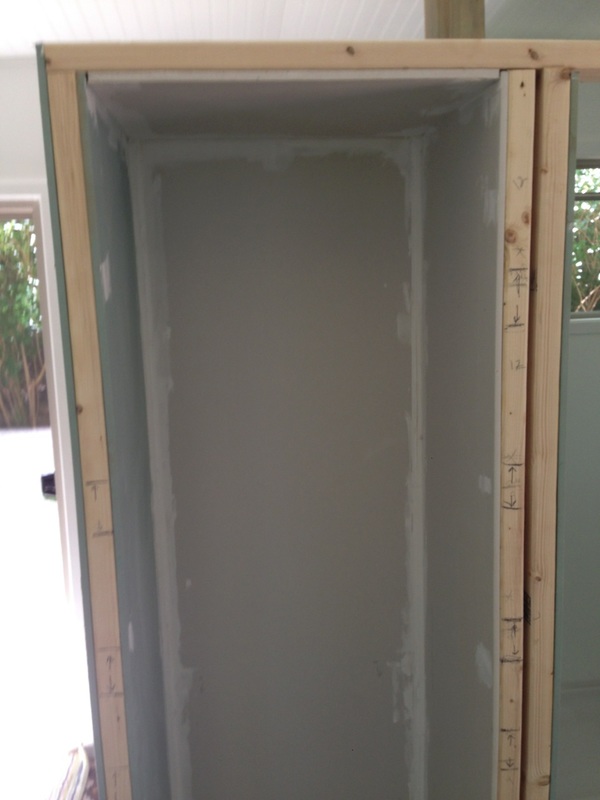
Our pantry, with full pull-out drawers holds all our non-perishable food, our dishes, our biggest pot, water bottles, and even cleaning supplies. It's part of the wall that separates the bathroom from the kitchen and living area.
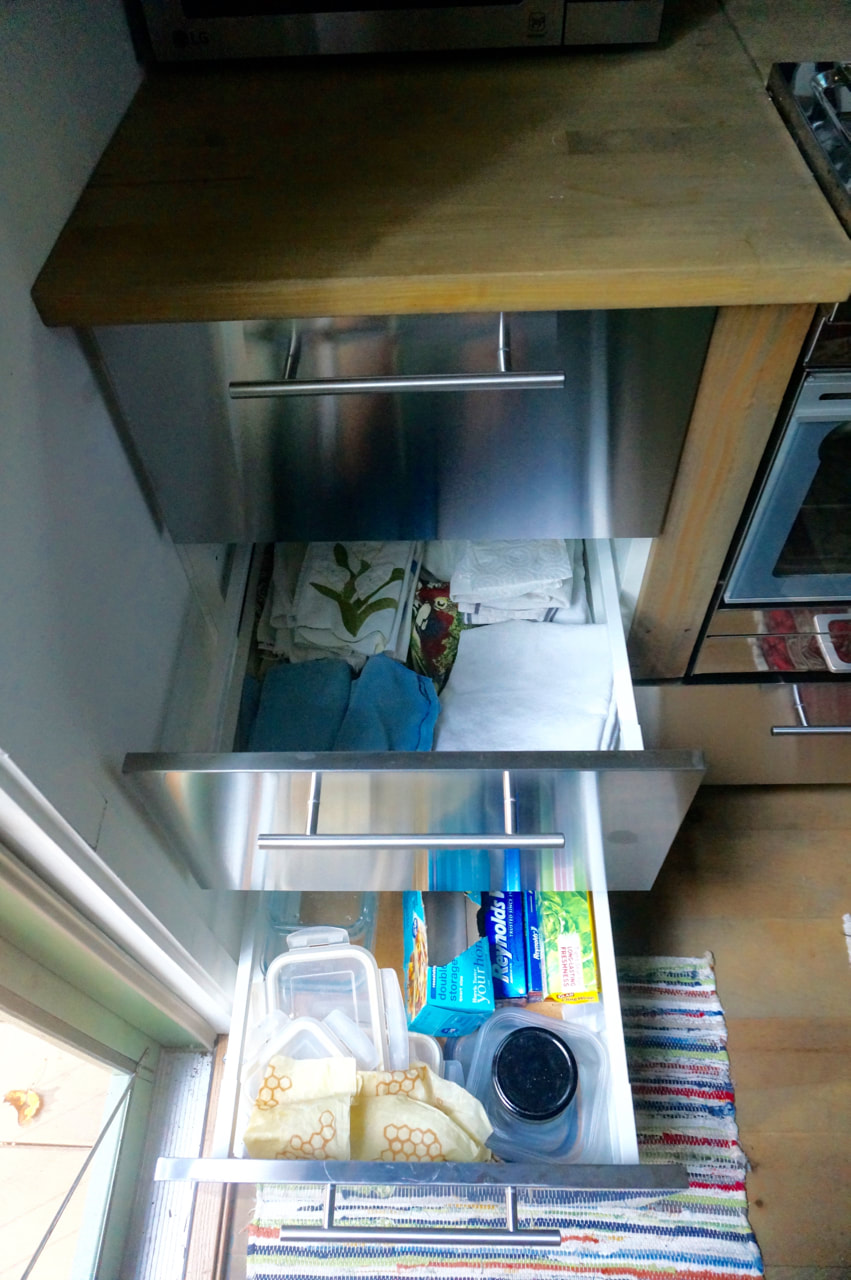
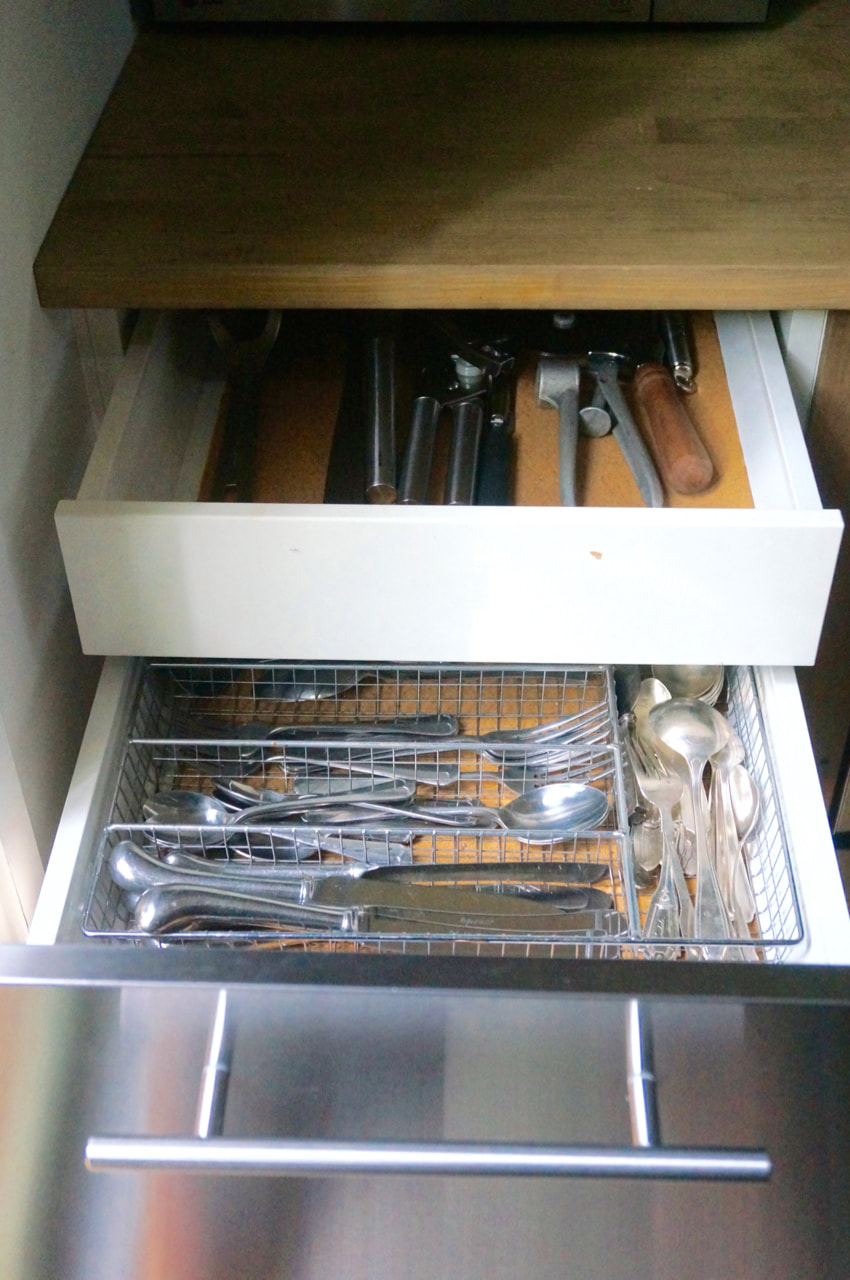
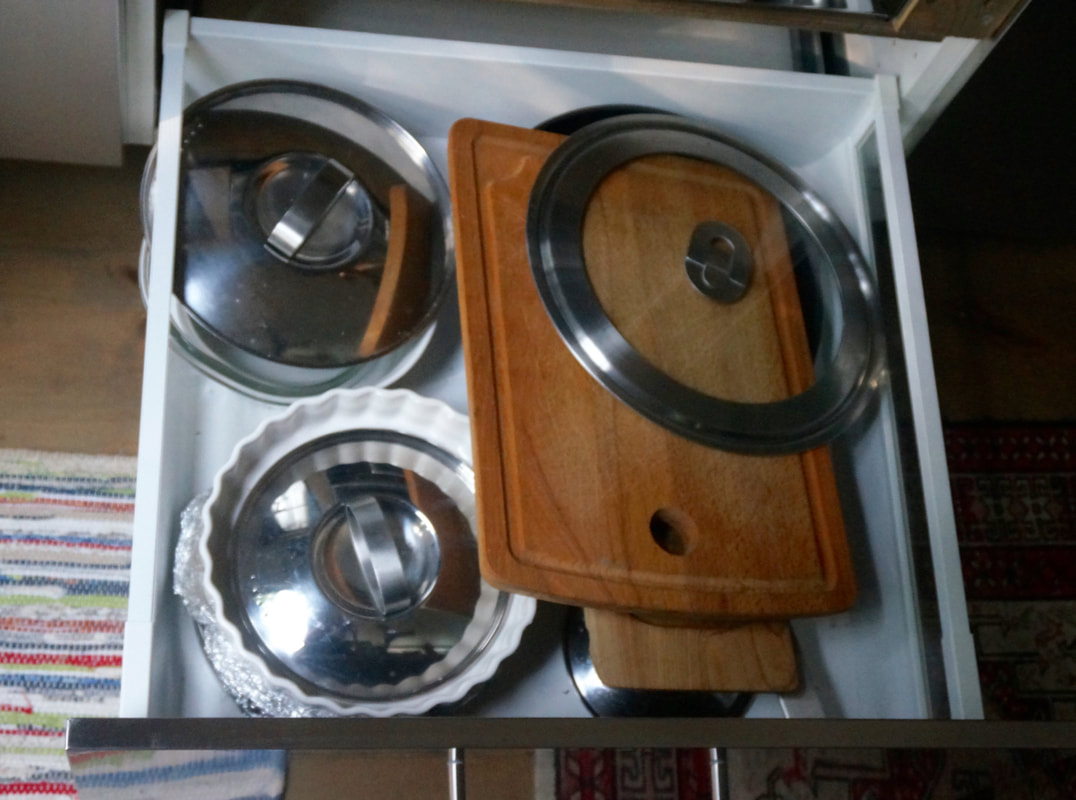
Four deep drawers hold silverware, utensils, dish towels and napkins, storage containers, pot lids, cutting boards and serving pieces. Ours, from IKEA, pull out all the way and close softly. The drawer with silverware has an inner drawer to make use of the full height of the drawer.
Picture
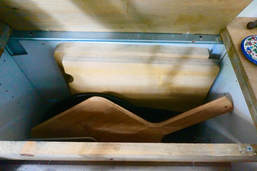
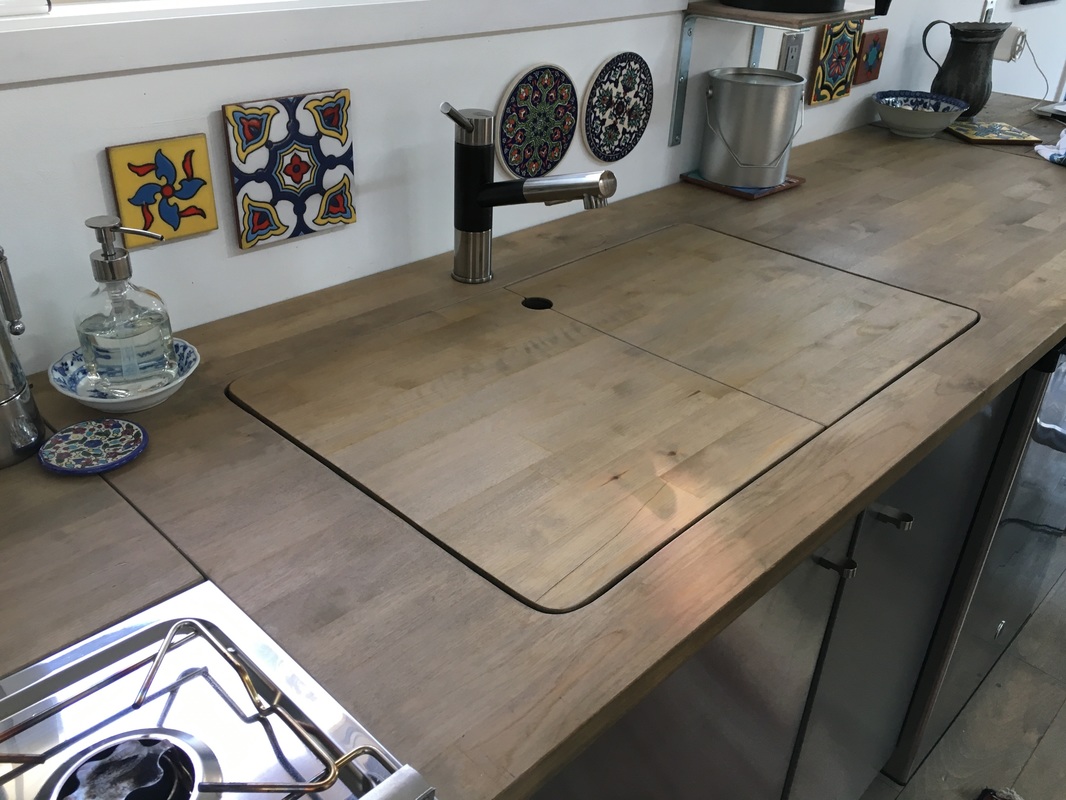
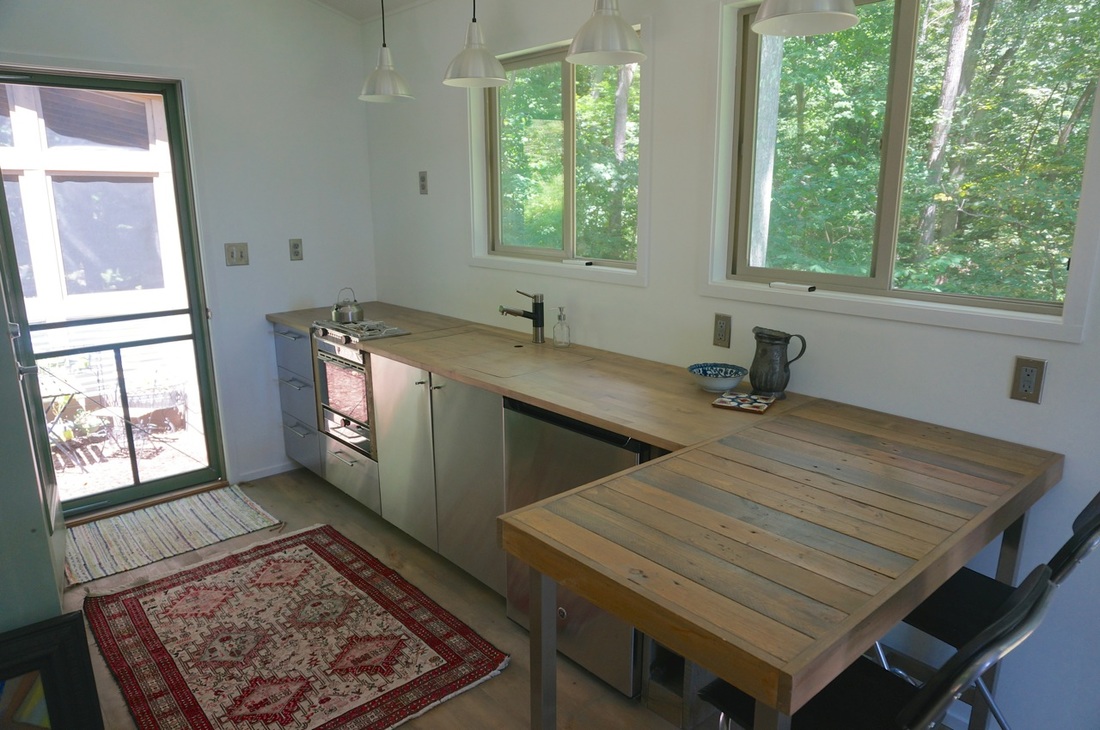
The counter behind the oven isn't attached. We can lift it to reach a space where we have room to store big items like the pizza stone and peel, baking pans and the countertop sections that cover the sink.

Picture
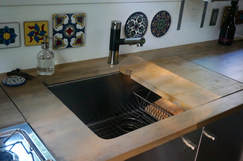
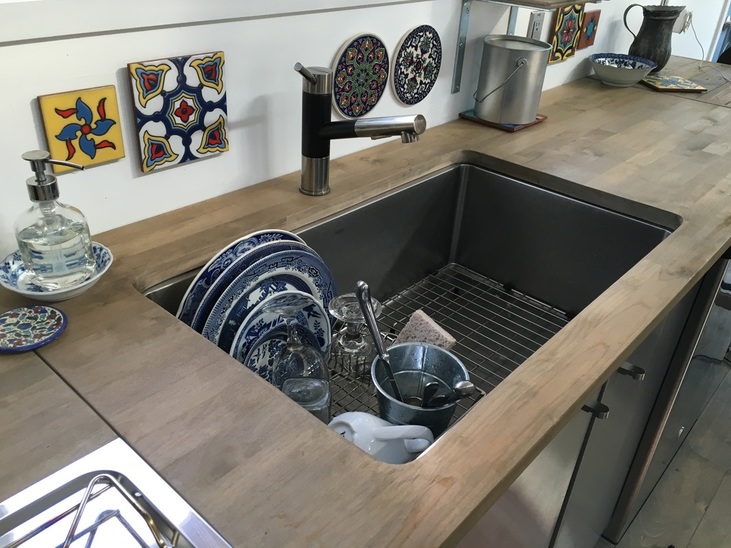
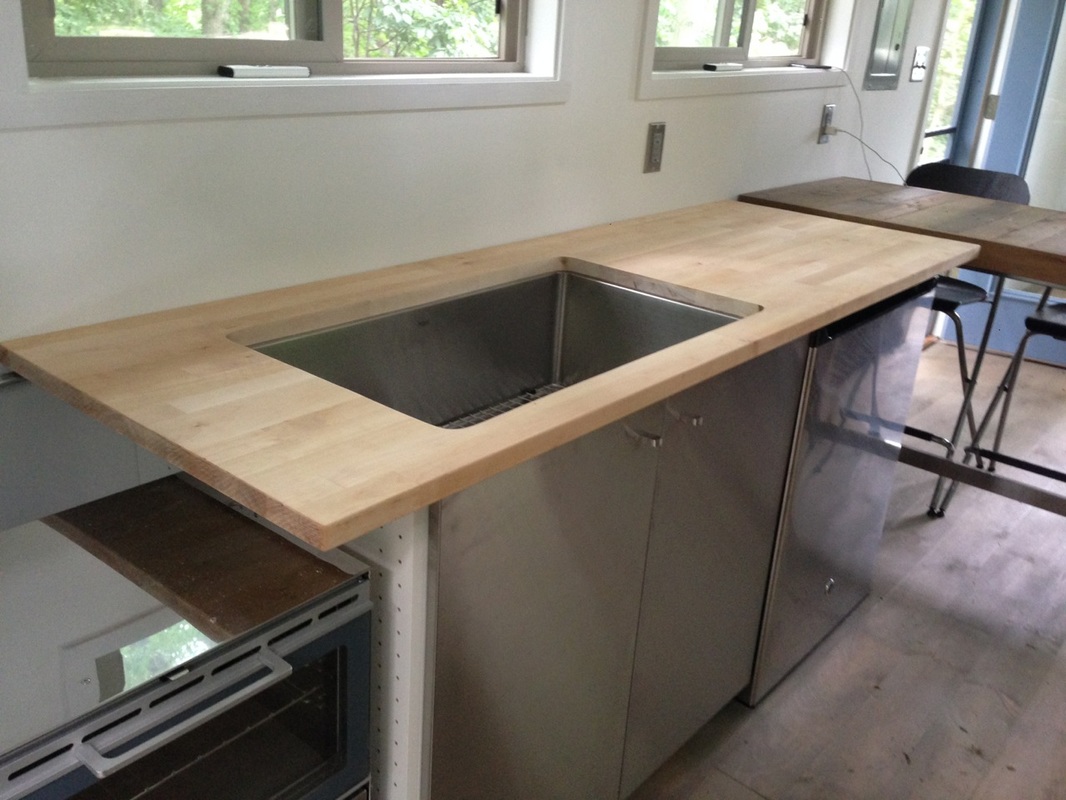
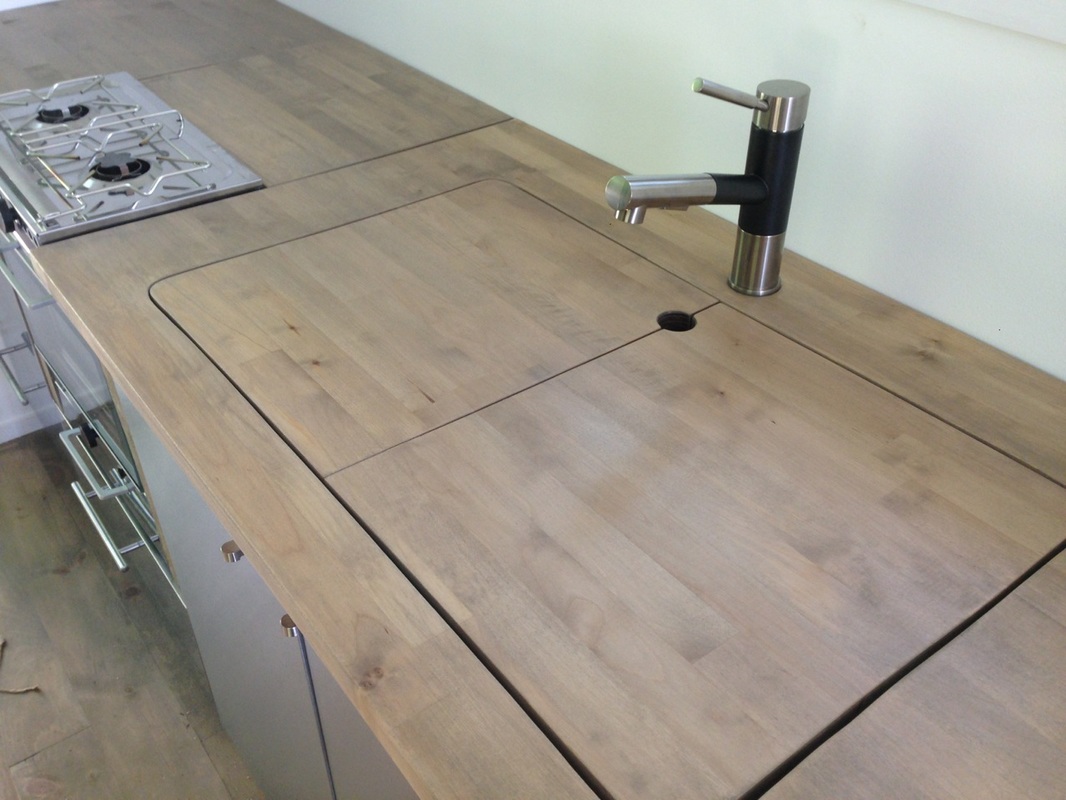
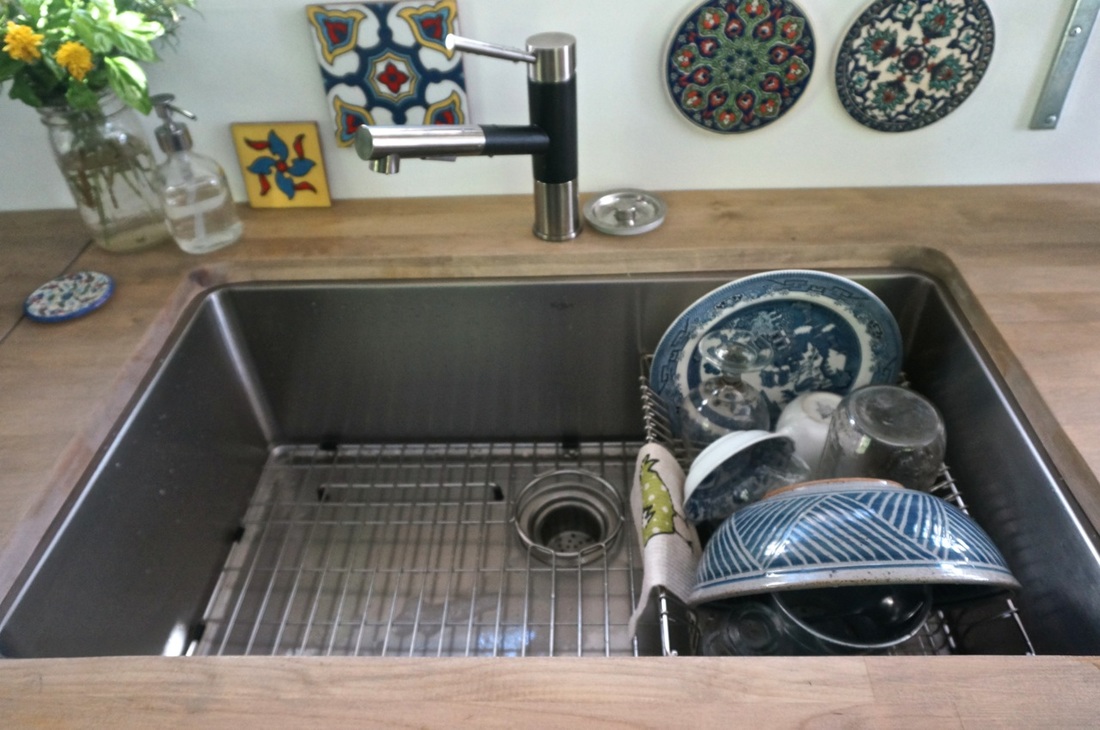
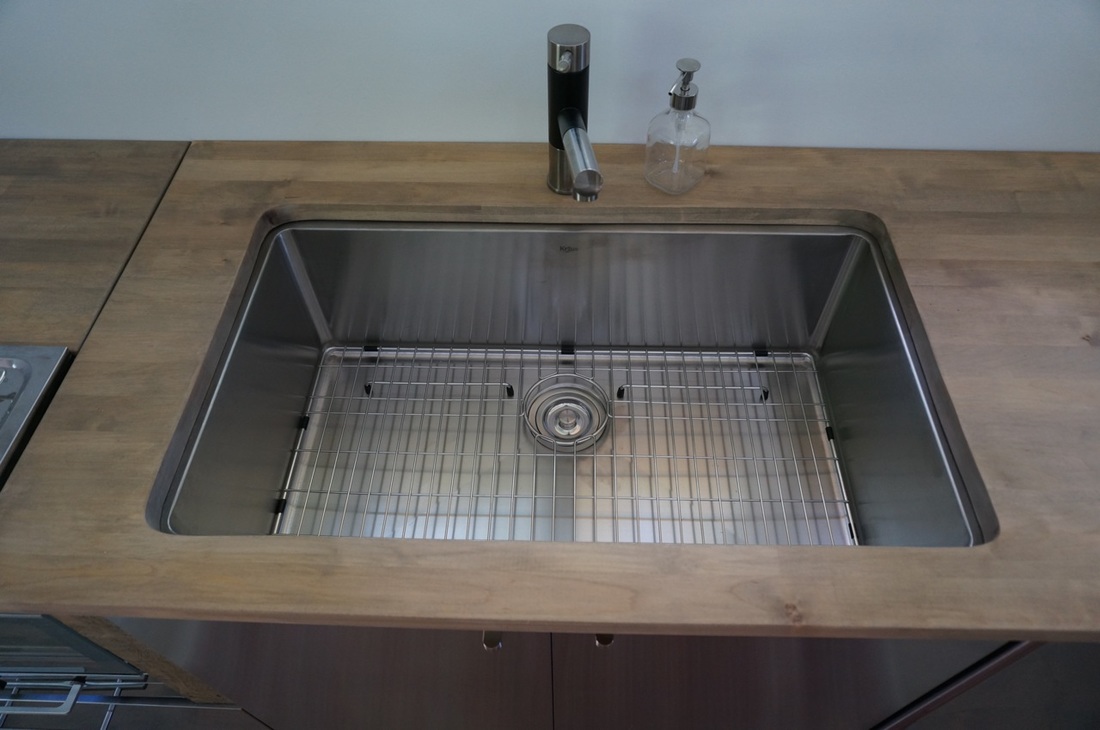
We have a giant sink in the tiny house, and it's a great place to store drying dishes (or dirty dishes!). We cut our butcher block countertop carefully when it was time to install the kitchen, then drilled a hole in the center and sliced the cutout in two. When we need more counter space, we pull out one or both of the inserts and hide away anything we don't want out.

Picture
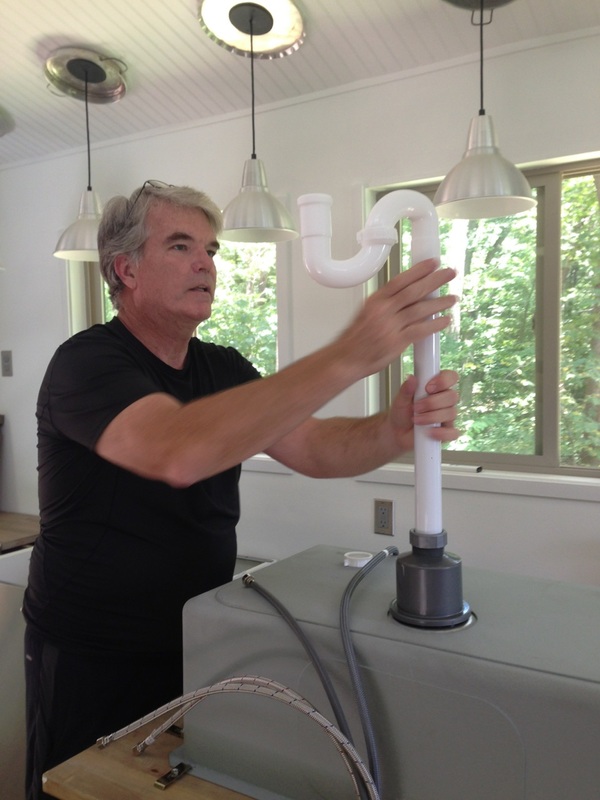
The sink is big, but there's still enough room under the sink to house a point-of-use water heater, a dish towel and cleaning rag, plus  two bins—one for trash, the other for recycling. (The handy bins, complete with fold-down handles, are another IKEA find.)

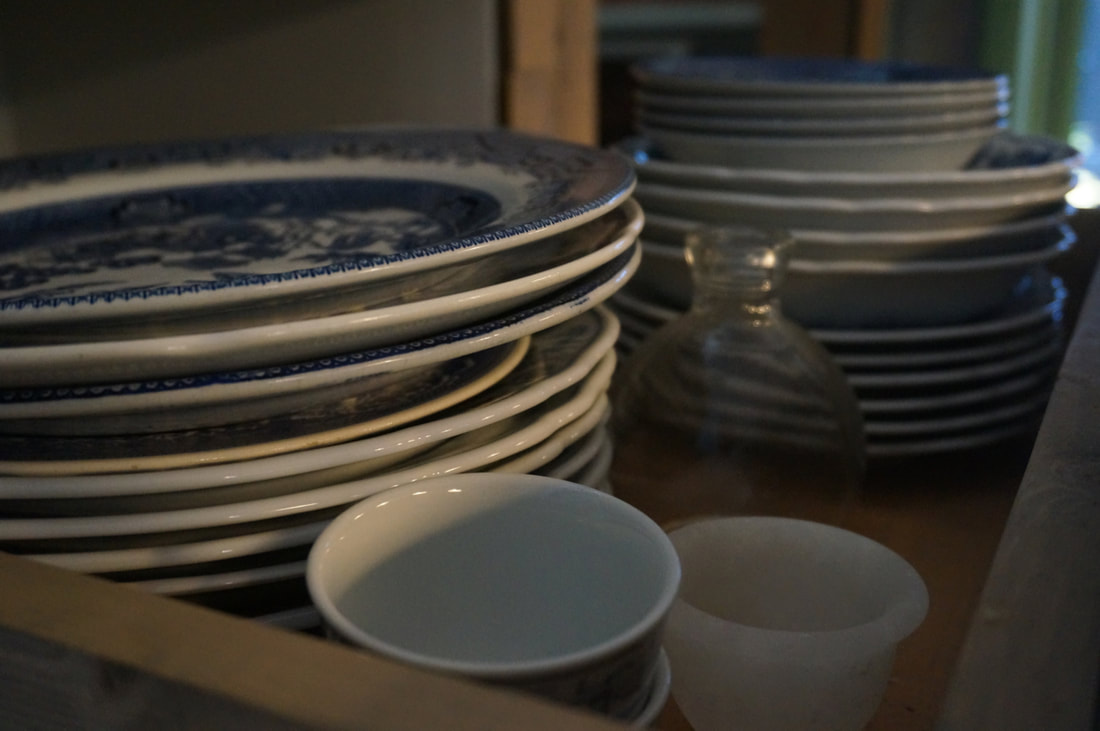
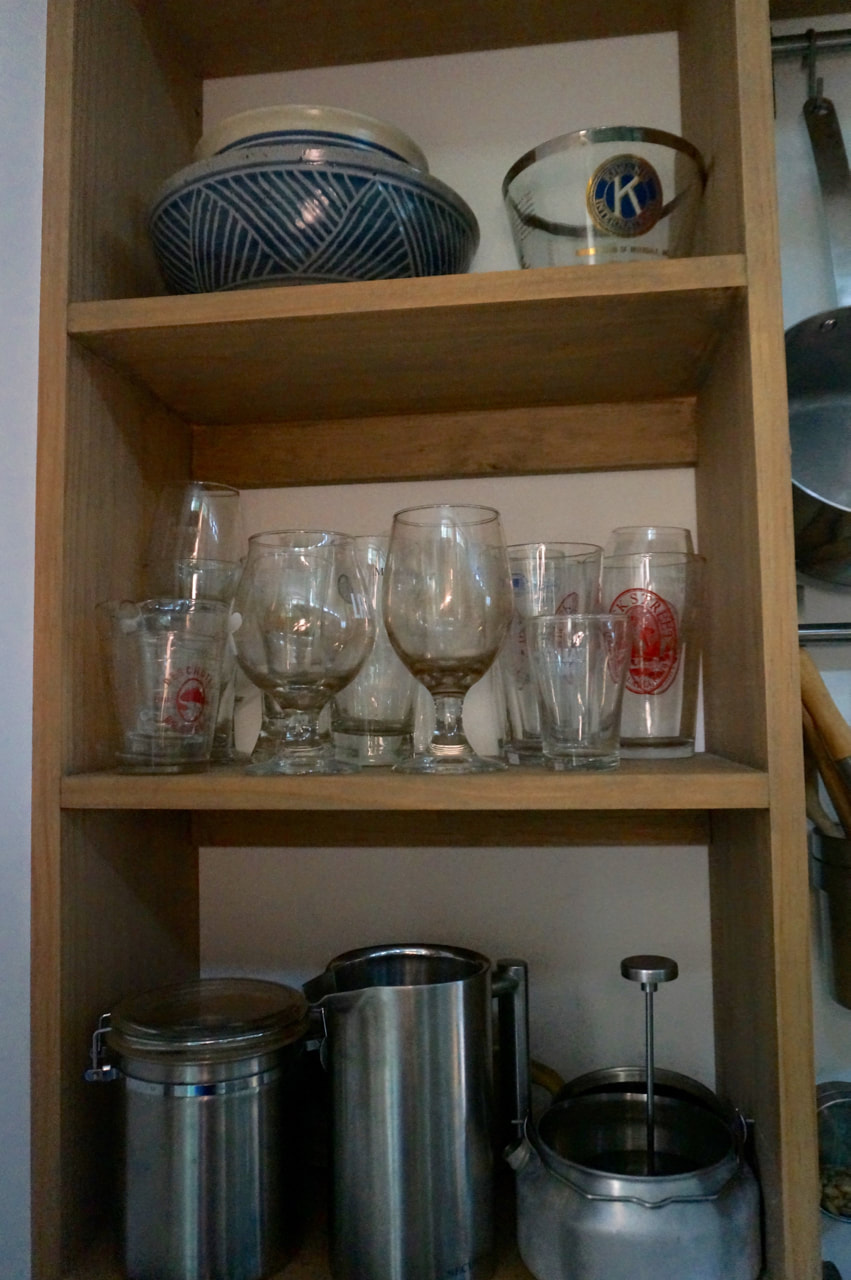
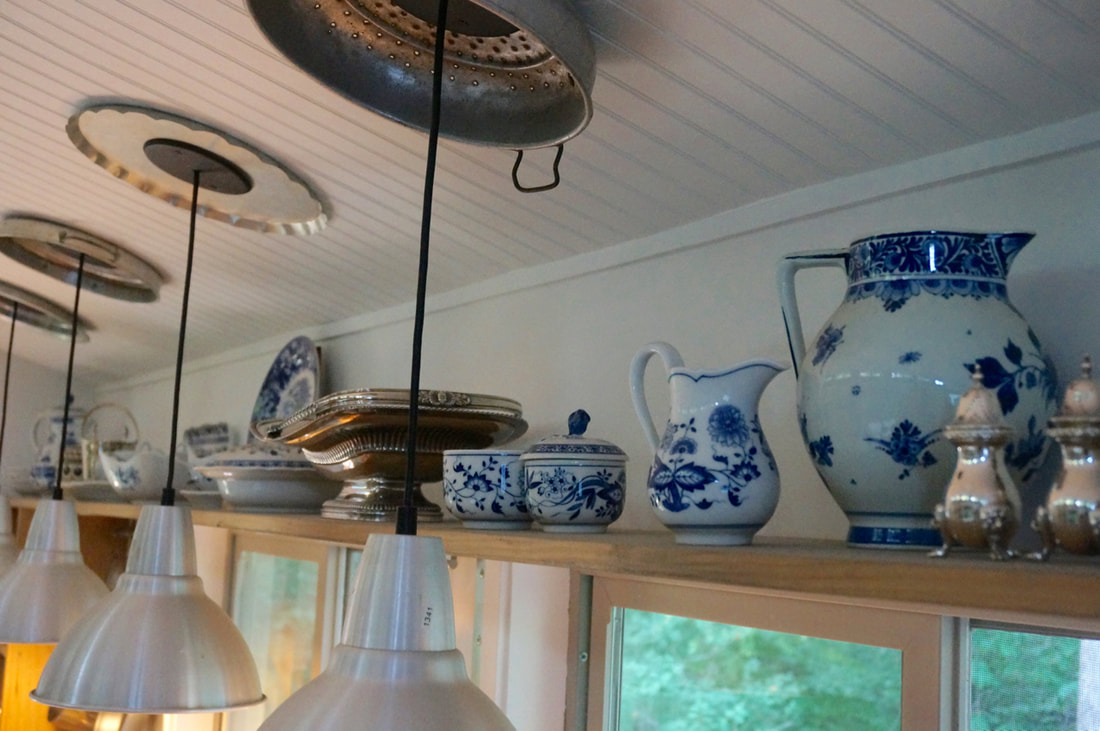
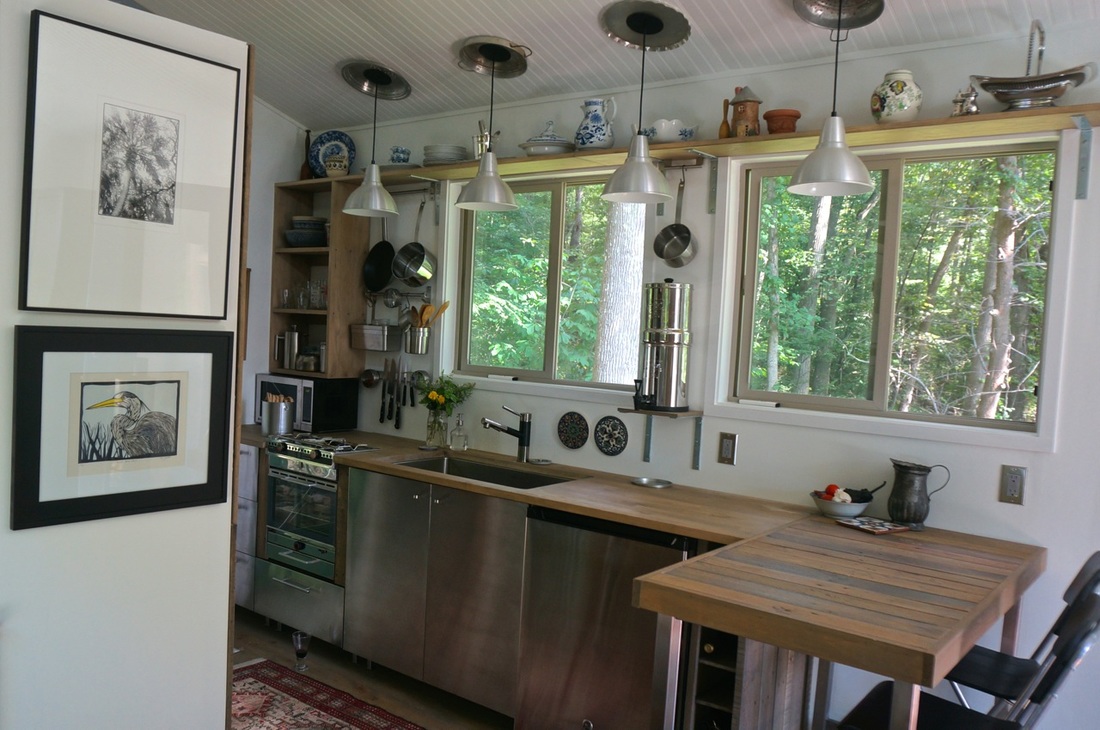
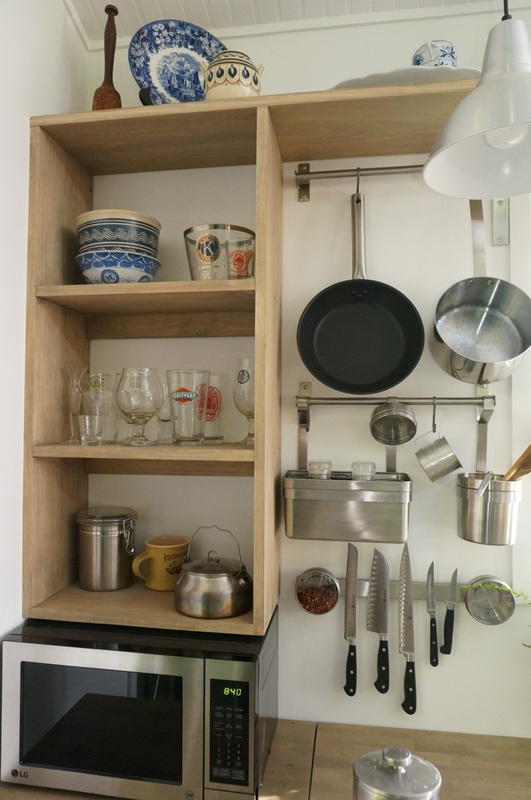
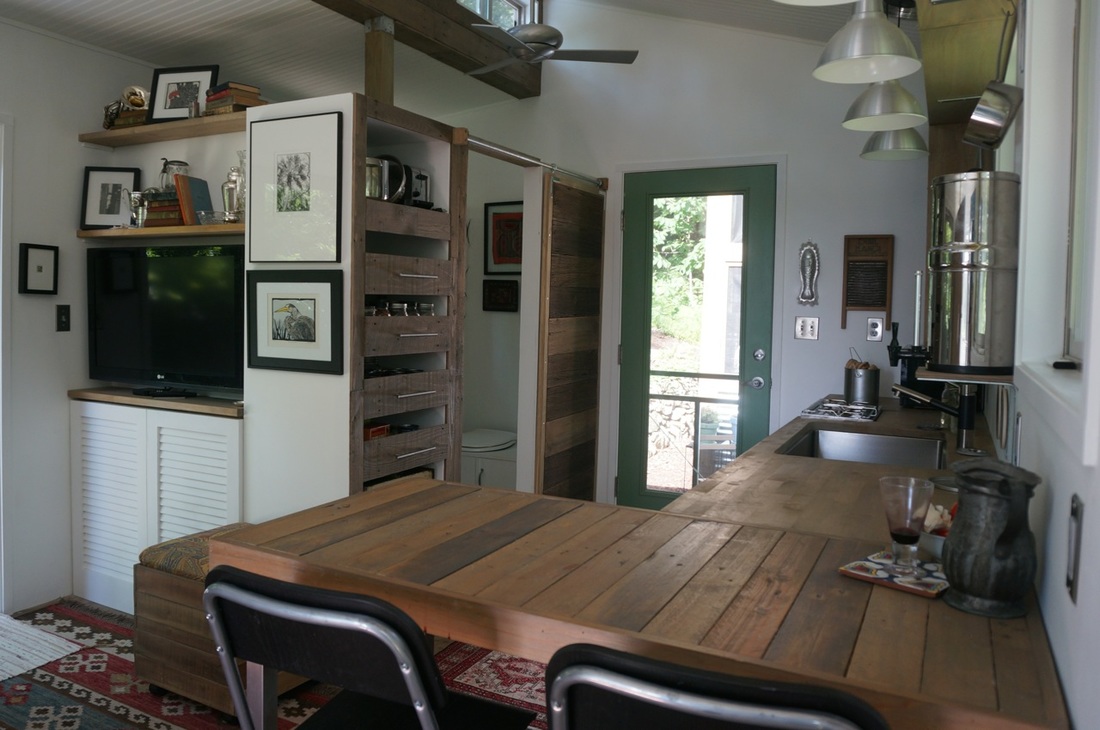
Open shelves make accessing glasses, the coffee press, and bowls a cinch. (Anything that doesn't look good on an open shelf finds its home in one of the pantry drawers.) A 10-foot-long shelf running between the windows and the ceiling holds china we don't need every day (plus some pretty heirloom silver). We have a step ladder that slides under the kitchen table to access the top shelf.
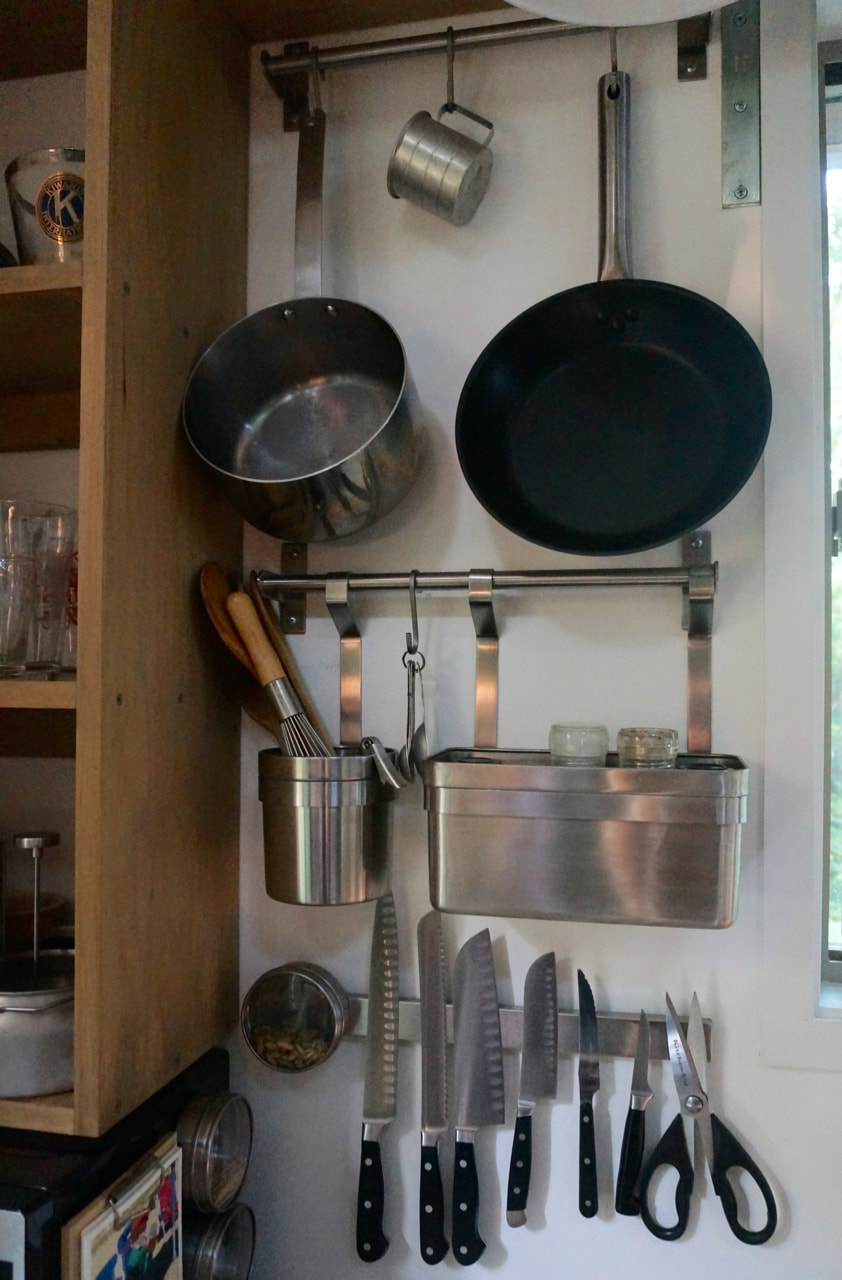
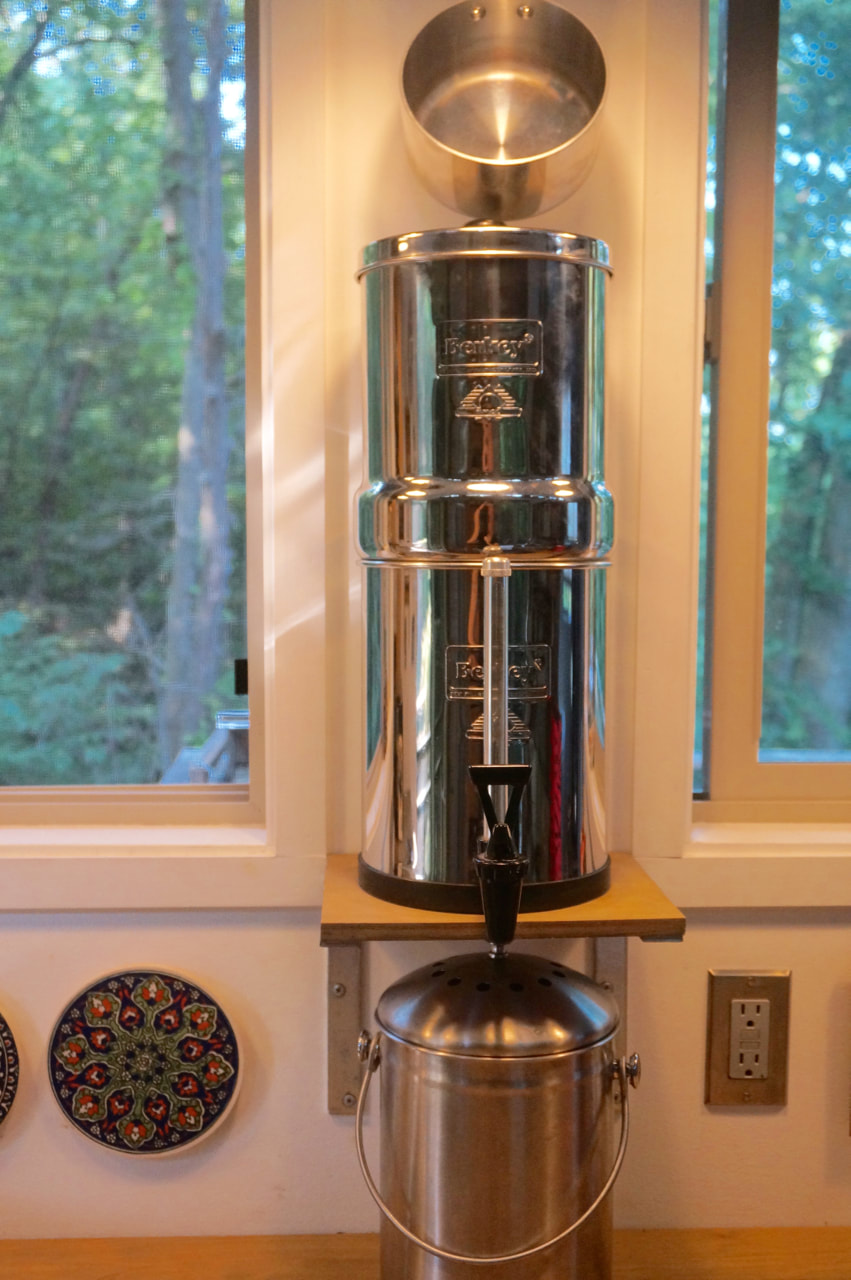
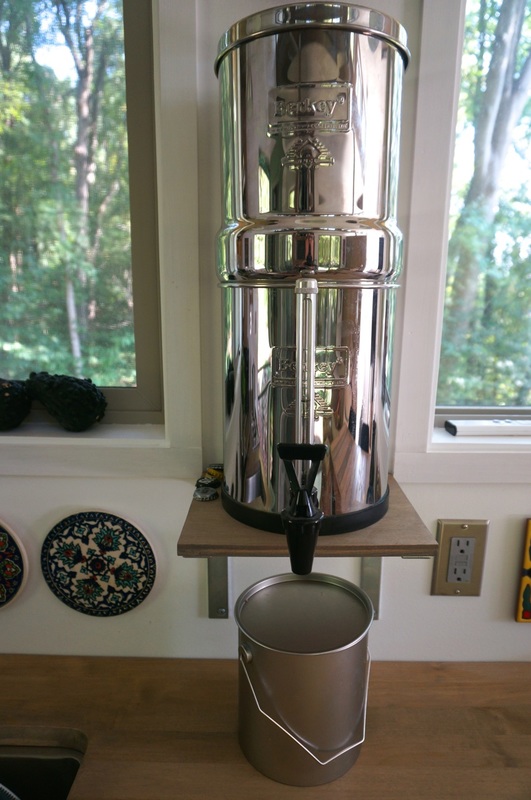
We make up for any square-footage deficit by maximizing vertical space. Our knives, spices, most-used pots and pans, wooden spoons, water filter and more hang on the wall. Once again, IKEA was both inspiration and supplier for much of this hardware.
Picture
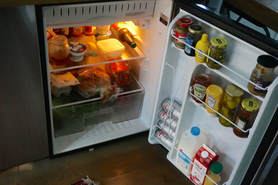
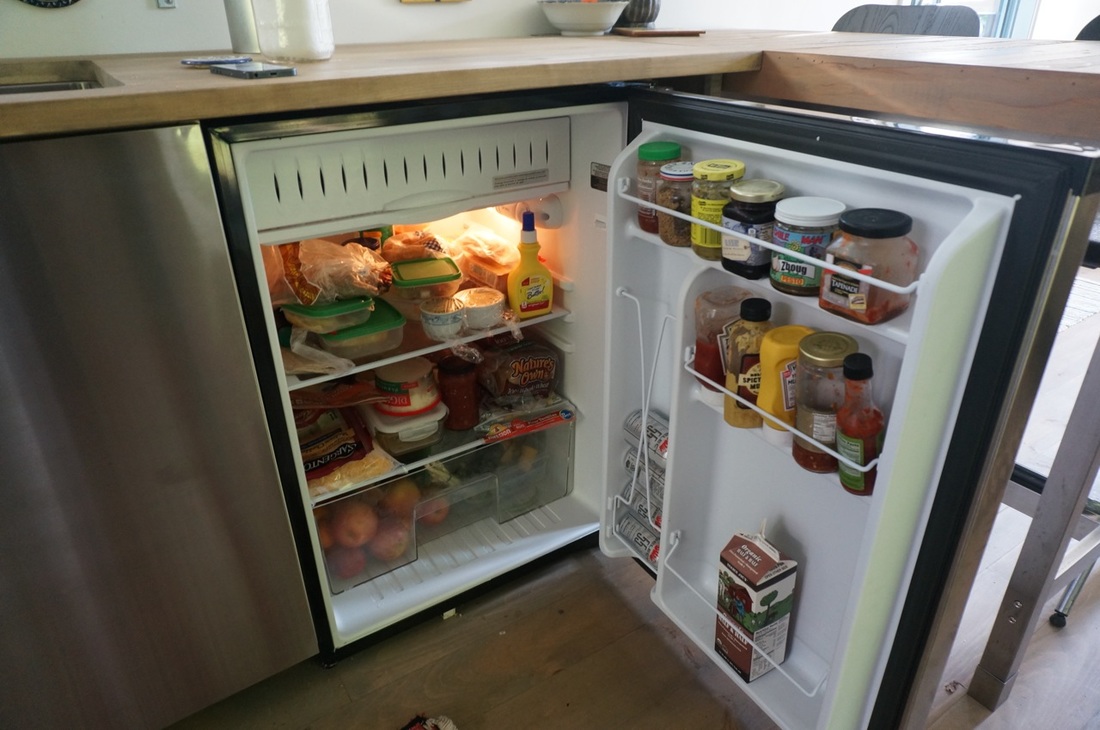
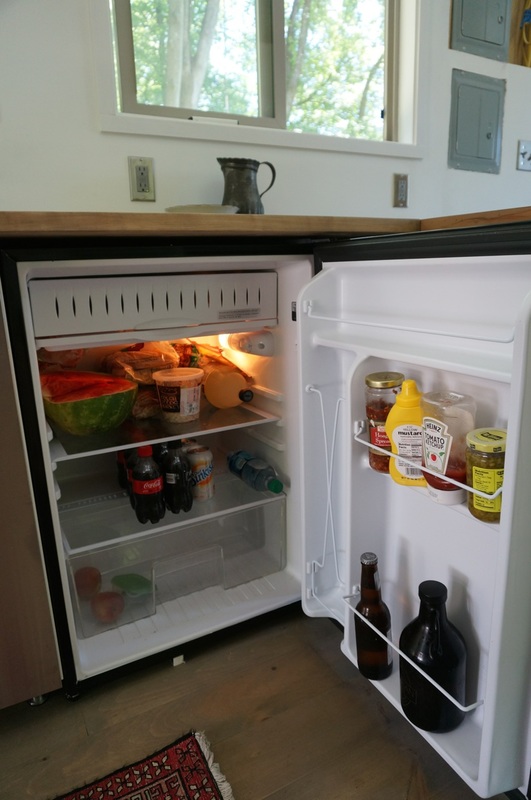
​Our refrigerator is big enough to hold all the perishable food we need for a party and/or a week's worth of meals. We went with an Energy Star, space-saving, under-the-counter model from GE that offered the most bang for the buck. What we don't have in our kitchen: a freezer. But that was a strategic decision. Our friend, on whose land we live, already had an under-used freezer in her basement. It takes just a minute or two to walk over and pick up something from her freezer. 

Picture
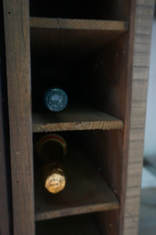
I've written a few blogs about "using every inch." That's nowhere more important than the kitchen. When I realized I had an extra six inches between the refrigerator and where I planned to put the kitchen table, I tried to think of the best way to use the space; a glass of wine helped the thinking. Voila! A wine rack, made from one of my favorite materials: a shipping pallet.

1 Comment

Water Works!

1/15/2017

2 Comments

 
Picture
Last January, I told the tale of our water woes. The ground froze before we finished under grounding the water pipes leading from our friends' "big house" to our tiny house. We drained the pipes and carried in water for drinking and cooking the rest of the winter. We showered at rec centers and other peoples' houses. We often hauled our dishes over to our friend's house for washing.

A year later, with freezing temperatures day after day, I'm happy to report that we have running water in the house! We wash our dishes here! We shower here! When the temperature first dropped to the single digits, we did have an issue—which has since been resolved. All of this wasn't just a simple matter of digging trenches for the pipes....
  • Step one: Finishing the water line to our house. We excavated rocks so that we could finish trenching to the tiny house. Then we used foam insulation around our hose and encased that in PVC pipe for protection before burying it underground.
  • Step two: Setting up holding tanks. We were still worried that pipes might freeze because we couldn't get them below the freeze line (down 20 to 30 inches), given our rocky mountain terrain. We decided to create a holding tank up the hill from our house where we could keep water from freezing. Bill constructed an insulated box large enough to hold three, 78-gallon barrels (rated for drinking water). He connected the barrels and put a thermostat-controlled panel heater inside the box. We fill the barrels from spring fed water coming down the mountain, as needed. Our tiny house can now draw water from the climate-controlled tanks.
  • Step three: Protecting the faucet. The first place to freeze last year was the short section of pipe above ground that leads to our outside faucet. Bill wrapped that section of hose in aluminum foil and then attached heat tape. He insulated the faucet where it connects with the house, and that connection hasn't (knock on wood) frozen since.
  • Step four: Better insulating the pipe running under the house. We have a section of PEX piping that runs under the house, between two floor joists, from our bathroom to our kitchen sink. While that space is sealed and insulated, it was obviously too cold on frigid nights. Water ran from the outside tanks to our bathroom without a hitch, but we couldn't use the kitchen sink after the pipe under the house froze. So, Bill insulated the PEX pipe leading to the kitchen better and installed an incandescent light bulb in that space to provide a little heat to the area with the pipe. Only once has the pipe frozen since then, when we had a number of days of single-digit weather—but at least the pipe didn't burst! Our new plan is to replace that PEX pipe with a heated, potable water hose. 

With the temperature still below freezing outside, we're quite happy to have hot, running water. It's something I've taken for granted in the past—but no longer! 

You can read more about our plumbing, water pump and water heaters in old blog posts. Please click on the images below for more details about our winter water solution.

2 Comments

Big Sink in a Tiny House

12/21/2015

9 Comments

 
Picture
Our square footage may feel limited to some, but the only question we get asked about the size of our sink is why it's so big. So, here are a few answers:
​
1. We have room to wash dishes on one side of the sink and fit a drying rack on the other side.
2. We can easily fill our bucket and watering can in the sink.
3. We don't have a washing machine in our house but, in between trips to our friend's house for laundry, we have plenty of room to wash out clothes in the sink. (We hang things in the shower to dry.)
4. We can hide away all the dirty dishes from a dinner party in the sink and not think about them till our guests are gone.
​5. Etc.

Just how big is the sink? We went with a 30x18-inch sink basin that's 10 inches deep. The Kraus model we picked came with a removable rack on the bottom, and I'd never want a sink without one now. Pots don't scrape the bottom of the sink. Not to mention that the rack makes a great, built-in drying rack. Our Kraus facet is high enough to slide buckets, growlers and the like under it to fill, plus it has a pull-out sprayer that lets us get water anywhere we need it in the sink.

Best of all, when Bill cut the butcher block countertop, he was careful to preserve the full section of wood he cut out. We drilled a finger hold in the middle, then split the piece in two. Now we can cover one or both sides of the sink when we need more counter space or want to hide away unwashed dishes. When we want the sink open, the wood sections fit in the space behind our stove where we store pans and our pizza peel.

9 Comments

What's Behind the Wall

9/7/2015

0 Comments

 
Picture
Bathrooms require privacy; naturally, we built a wall to separate the bathroom from the rest of our living space. 

But there's no room to waste in a tiny house, so there's more to this wall than meets the eye. In the living room, we have a wall-mounted TV, pictures and shelves. In the kitchen, the wall becomes a pantry. In the bathroom, a recessed medicine cabinet, lighting, outlets and the sink and shower line the wall. 

We wanted to be able to get at the "guts" inside the wall should something come up, so the TV pulls out to reveal two doors and the bottom shutters come off completely, giving us access to all our plumbing. It's a hard-working wall.

Please click on the pictures below for more details.

0 Comments

Kitchen Bliss

8/29/2015

6 Comments

 
Picture
We prepared food in our tiny kitchen for more than 20 people this week after inviting friends and family to tour our almost-complete home. The kitchen makes food prep and entertaining guests a breeze. The two of us can work in the space without bumping elbows, and more than once we've been told, "The kitchen feels so big."

Some kitchen specs:

Our butcher block counter top runs 9 feet, but feels as though it extends another two feet because our counter-height table sits at the end. If we need even more counter space, we have inserts that fit over the  sink. We cut the counter to build in our oven/stove, and we can lift out the section behind the stove to store pans, racks and the sink inserts when not in use. The counter is IKEA's birch Hammarp, sanded down so that we could stain it to match our other wood. 

The sink is a whopping 32" undermount model from Kraus. We don't have a bathtub, so we wanted a sink big enough to wash out anything that needs cleaning. It's also big enough that we can leave our dish drainer in the sink and still wash dishes beside it. We put in one or both butcher block inserts if we need more counter space and less sink. The faucet is a pull-out, single-lever model from Kraus. Hot water is courtesy of our Bosch mini-tank. More on that here.

The stove/oven is an alcohol-burning Origo 6000 from Dometic. Find more on the stove here.

Our refrigerator is a 5.6-cubic-foot Energy Star GE model. It was hard to find an affordable fridge of this size made to fit under a counter. There's only a tiny freezer, but we have access to a full-size freezer in our friend's house just a short walk away. (One example of many compromises weighed to make the most of our compact space.)

As far as storage goes, our pantry is the workhorse. Six sliding shelves hold everything from dishes to food to cleaning supplies. The top, fixed shelf has room for the toaster, food processor, big pot, colander, water bottles and more. We also built shelves that fit over the microwave and across the top of the window. The long, high shelf is great for extra china and decorative pieces that wouldn't fit in the tiny house otherwise. An IKEA magnetic bar holds our knives and a couple Grundtal racks hold spices, wooden spoons, pots and more.

Our base cabinets come from (where else?) IKEA. We had plans to build our own cabinets and drew  initial sketches. We went to IKEA to get ideas and came home, instead, with cabinets.  We realized they were the perfect size, design and price point--so why reinvent the wheel? We spent extra to go stainless on the doors and drawers, but it was a splurge we both wanted.

The wine rack was a leftover-pallet-wood inspiration because we wanted a finished side on the refrigerator that made use of the six inches left at the end of the cabinets and fridge. Beside the wine rack, our counter-height table features a DIY pallet-wood top with a steel IKEA table base. It's the same dimensions a second table we made, so we can fit them together if we ever want to host a big feast. The folding chairs are also IKEA.

Four pendant lights keep things bright with LED bulbs. To cover the holes in the ceiling, we came up with the idea of using old kitchen tins sourced at an annual flea market that raises money for the hospital. (The fish mold on the wall came from the same sale.) At this point, you've probably already guessed that the lights came from IKEA.

We like our modern conveniences here, so a pint-sized LG microwave sits atop the counter. It's big enough to fit a dinner plate, but small enough to be energy efficient. 

We don't have to but we choose to filter our drinking and cooking water. That's where our beautiful Berkey comes in. In the tiny house, we have the "Travel" model; in the screen house, we use the "Royal" model so we have enough water to wash dishes in our makeshift sink. Here in the house, we installed a shelf so that the Berkey didn't have to take up counter space. The spot beneath it makes a great home for our compost bucket.

That's all I can think of for now....Please ask questions about anything I've left out.

Please click on the pictures below for more details.

6 Comments

It's (Almost) a Kitchen!

7/24/2015

4 Comments

 
Picture
We have food cooling in the refrigerator, a kettle warming on the stove, a gigantic sink, a table to eat at, silverware organized in a drawer.... Still to come in the kitchen are shelves, backsplash, pot racks, slide-out drawers in the half-finished pantry and, most critically, running water. 

Happily, the plumbing is progressing and we should have our wee-sized, point-of-use water heater hooked up before too long.

Kitchen specifics:
  • Stove/oven: Our Origo 6000 is an alcohol-burning marine stove. Cooking would quickly draw down our solar-fueled batteries and we don't want to use propane for eco reasons. So, we've gone with clean-burning, renewable alcohol for cooking. It's tiny--but so far, so good.
  • Refrigerator: Our Energy Star GE fridge is efficient enough that solar has no problem powering it. Yes, it's summer, and the sun is producing more energy now than it will in the winter, but Bill has us wired so the the highest energy users (hot water and refrigerator) can be plugged into the grid if needed. The 5.6 cubic feet of space seems plenty big enough for the two of us.
  • Sink: We don't have a bathtub, so we wanted a large sink for anything big we'll want to wash. Our 32x19x10-inch Kraus sink takes up a lot of counter space, so we have inserts that drop in to cover the sink when we want to spread out in the kitchen.
  • Counter-height table: The stainless base is from IKEA, intended for a stainless top but sold separately. We made our table top from sanded, stained pallet wood. Its the same dimensions as the table we assembled for the screen house, so we can put them together when we have more people over. The black/stainless stools are also from IKEA.
  • Wine rack: Another pallet wood project. More on it here.
  • Cabinets: We thought we'd need to build our own cabinets to get things just the way we wanted them (sink centered on the window; oven built-in, etc). Then we looked at an IKEA catalog and realized they had pieces that would fit perfectly and save us loads of time. We could have kept costs down by going with all-white doors and drawers, but we decided to splurge on stainless. The drawers are full pull-outs, and, by leaving two drawers off one unit, we were were able to build in our Origo stove/oven and even leave room for storage behind it.
  • Pantry: Eventually the pantry space will have six pull-out shelves and one fixed shelf (on the top). It's our main kitchen storage and will hold glasses, dishes and appliances, as well as food. Shelf slides are from Home Depot. The three bottom sliding shelves will house antique wood boxes with some of our bigger kitchen items; the top three sliders will have pallet-wood rims to keep things in place.

Though our kitchen footprint isn't large, the space feels big to us. Maybe it's all the light, maybe the high ceilings, maybe the open floor plan...or maybe we've just adjusted our spatial perceptions!

4 Comments

    Categories

    All
    Bathroom
    Bedroom
    Ceiling
    Ceiling Fan
    Composting Toilet
    Cooking
    Deck
    Design
    Doors
    Electrical
    Energy
    Flooring
    Floor Plan
    Framing
    Gutters
    Heating
    House Wrap
    Insulation
    Kitchen
    Making Furniture
    Materials
    Plumbing
    Rain Barrels
    Roofing
    Screen Porch
    Shower
    Siding
    Solar
    Stairs
    Storage
    Tiny House
    Trailer
    Ventilation
    Walls
    Windows
    Winterizing
    Wiring
    Wood Stove

    RSS Feed

Powered by Create your own unique website with customizable templates.