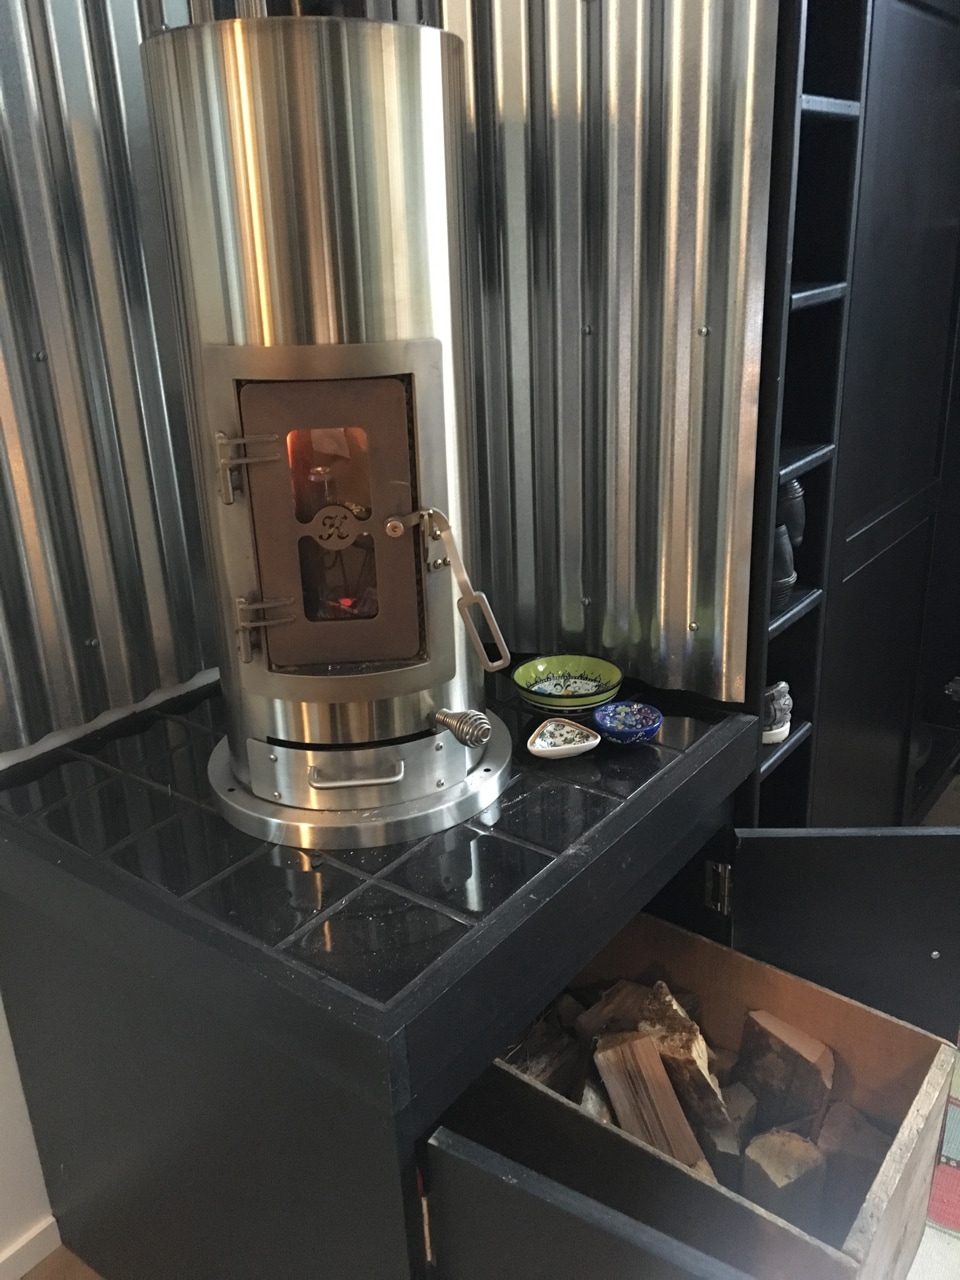
Sitting inside our toasty, tiny house on this cold, wet winter day, I am grateful for many things—not the least of which is our wood stove. We've written about installing our Kimberly wood stove from Unforgettable Fire, but we haven't said much about how we keep the heat pumping. Now, in the middle of our second winter, we've learned that if we want to continue to enjoy the snug warmth thrown off the stove, it's worth putting in time, attention and money to...
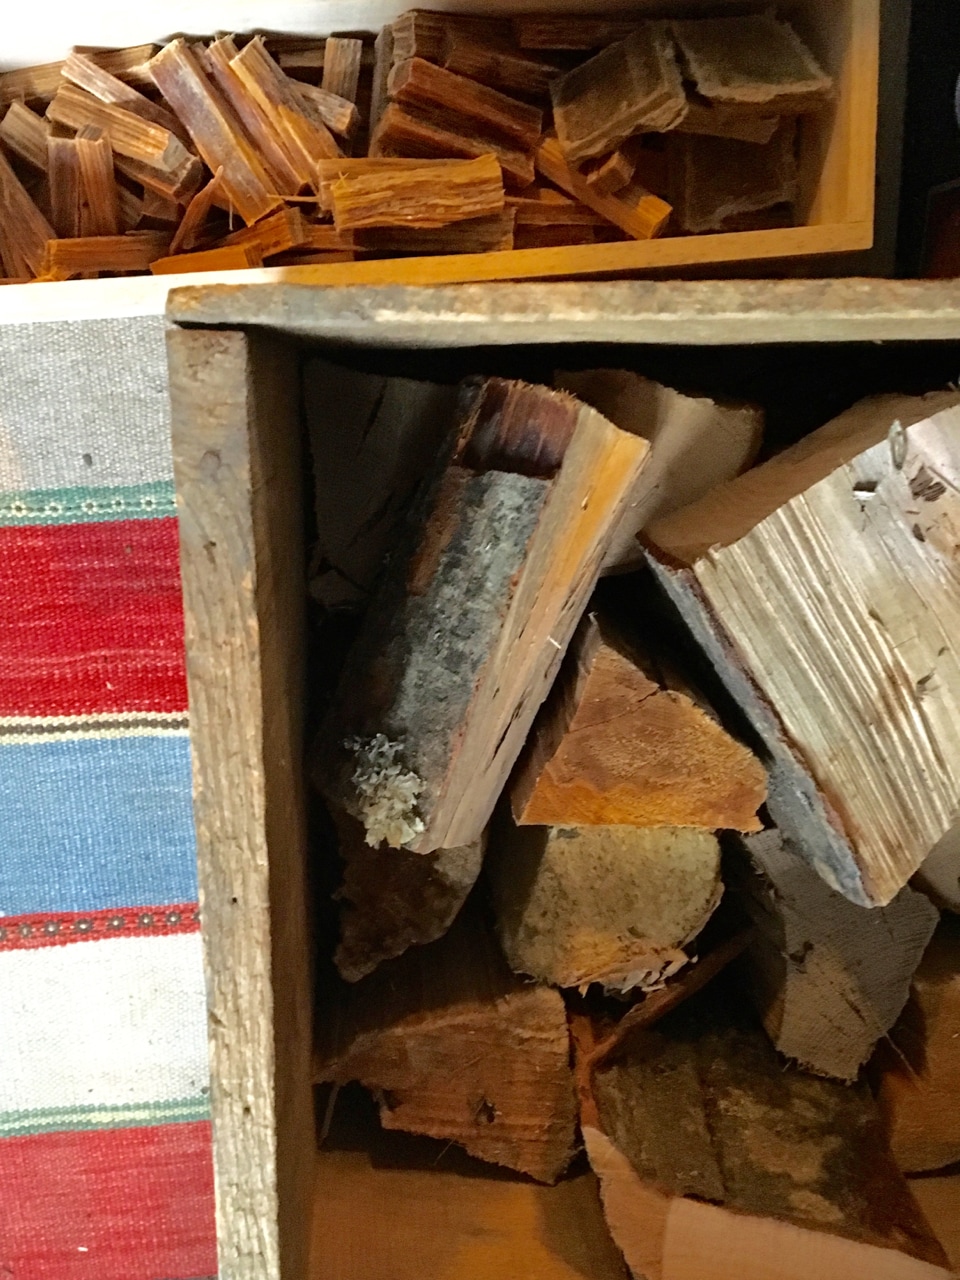
Invest in kiln-dried wood. When we met Roger Lehet, inventor of our Kimberly, he told us that the wood stove would function best the drier our wood. We started out burning wood from our forest site, after letting it dry for a few months out of the weather. It was obviously too damp. Before too long, the stove wasn't burning well; so, Bill took off the top plate and saw the baffles at the top of the burn chamber were clogged. We switched to burning store-bought, kiln-dried wood and the stove has burned better ever since. When Bill took off the top plate this year, the baffles were still clean; no more build-up from unseasoned wood. Our current choice of wood: Hotsticks, sold around here at 7-11s. We cut the logs in thirds and then split the thickest logs to an ideal size for our stove. (They also sell "nuggets," which wouldn't have to be cut, but we haven't found them near us.)
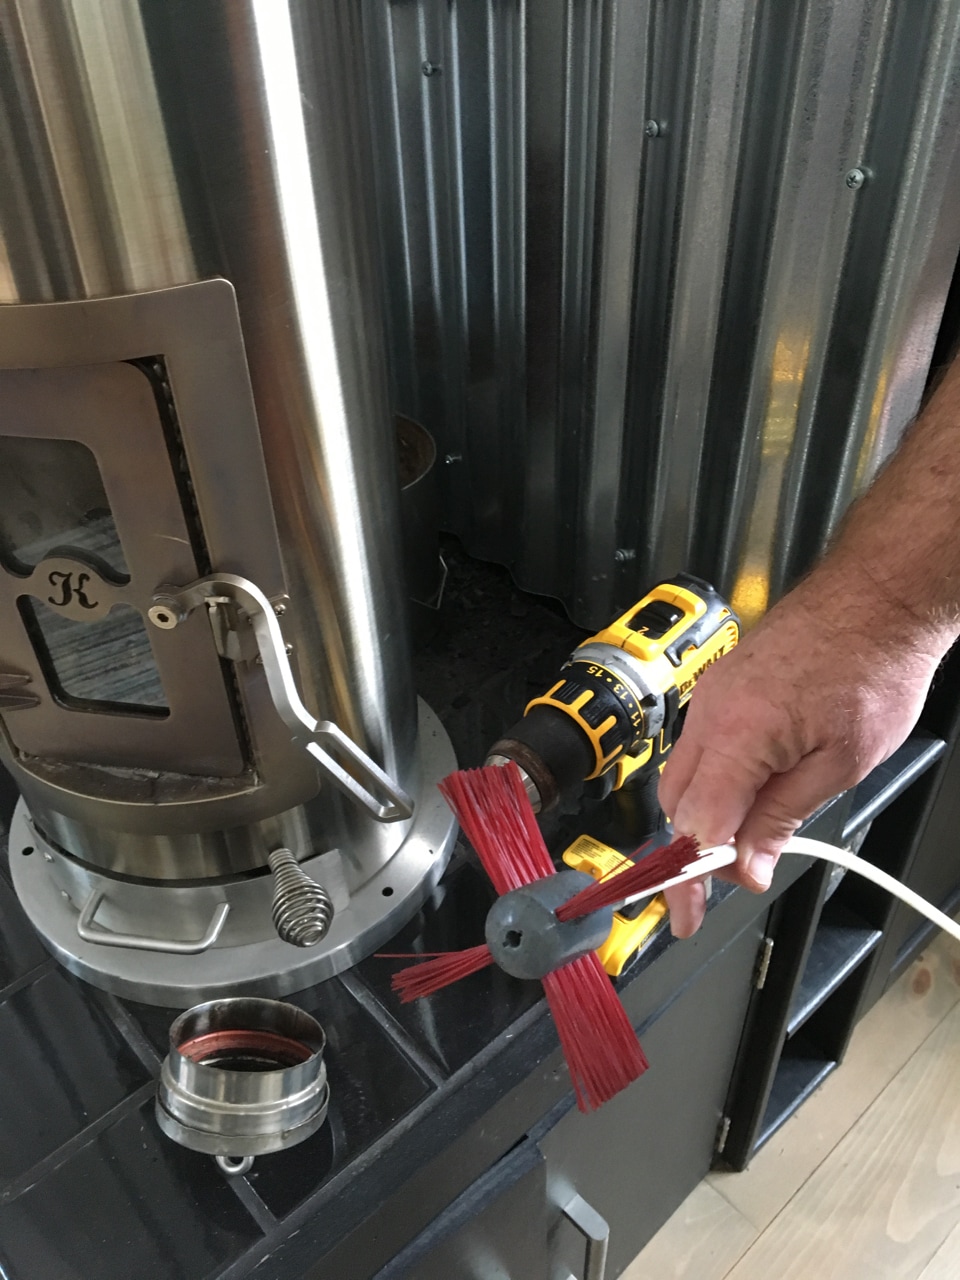
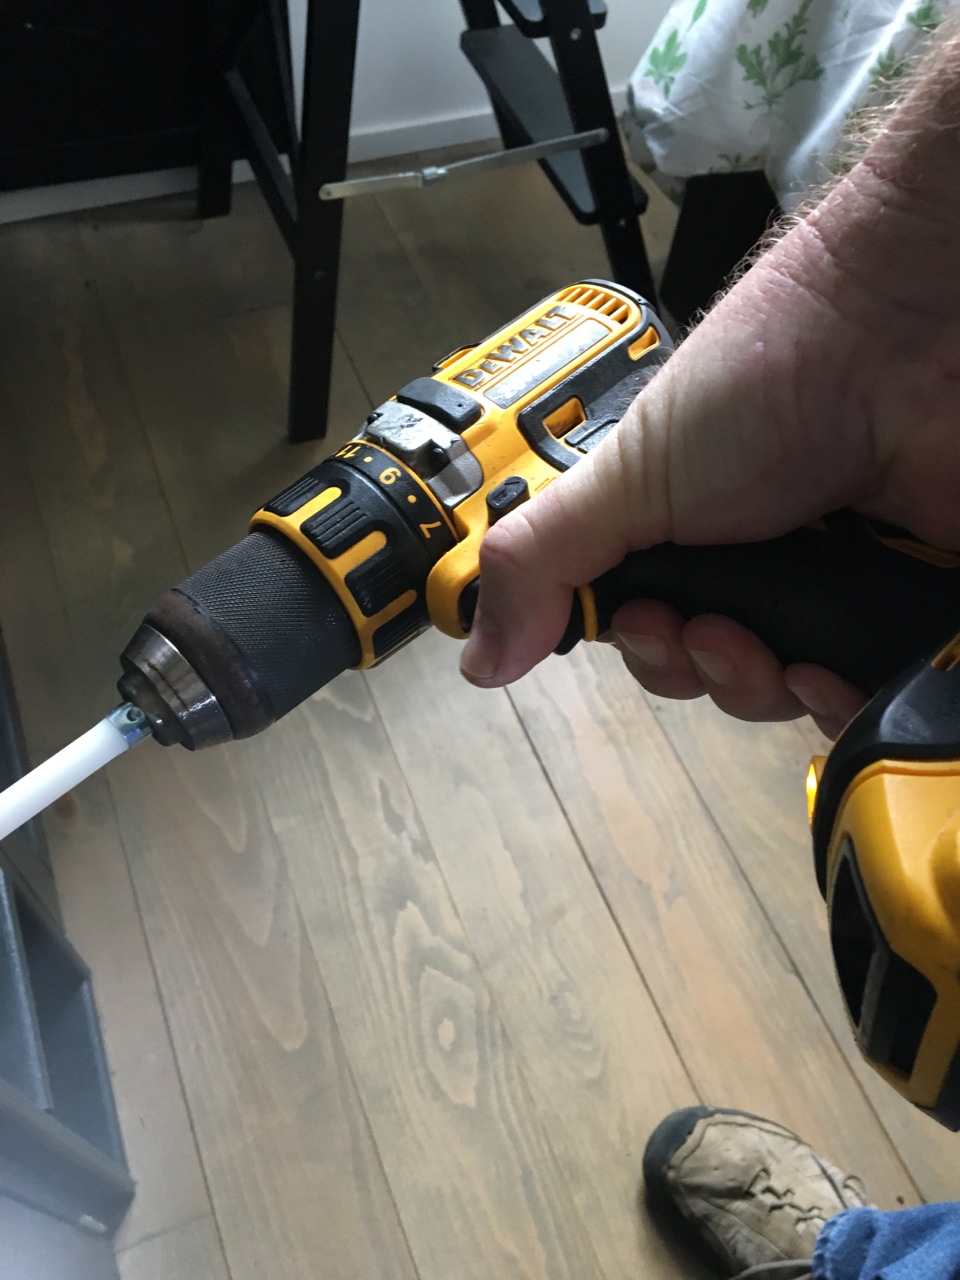
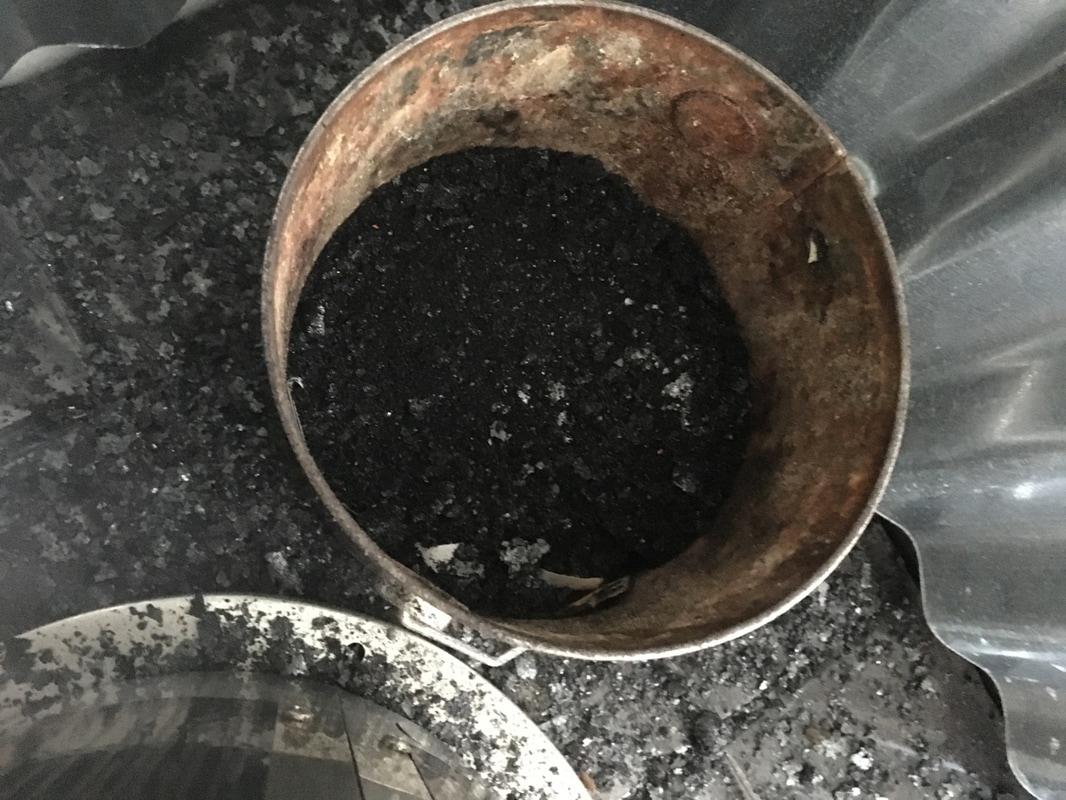
Keep the stove pipe clean. Besides performing better, investing in kiln-dried wood is safer. Burning unseasoned wood is the number one cause of creosote buildup, which in turn is the number one cause of chimney fires. Cleaning our stove pipe was on our to-do list for a while, knowing that we had used unseasoned wood for much of last winter's burns. When we finally got around to buying a stove brush, we were shocked to see how much creosote had built up in the stove pipe. Hopefully, we'll never see that much again, now that we're using seasoned wood, but it was a good reminder that regardless of what wood we burn, we need to regularly brush out the stove pipe. It's not even a tough or time-consuming job. To reach the full length of our pipe, we bought two Gardus SootEater Rotary Pellet Stove cleaners.
Brace the pipe. Last year's dump of three feet of snow bent our stove pipe above the roof. Inside the house, the pipe disconnected from the stove and water dripped in. We had to wait till the snow melted to straighten out the pipe and resume firing up the stove. So, this year, before any snowstorms, Bill added a rooftop brace to the pipe. (We used a Selkirk 6-inch stainless steel roof brace kit.) He also doubled up the boot that shields the hole cut through our roof. (We used a high-temp model from Pipe Boot Express, and Bill coated it with Flex Seal.)
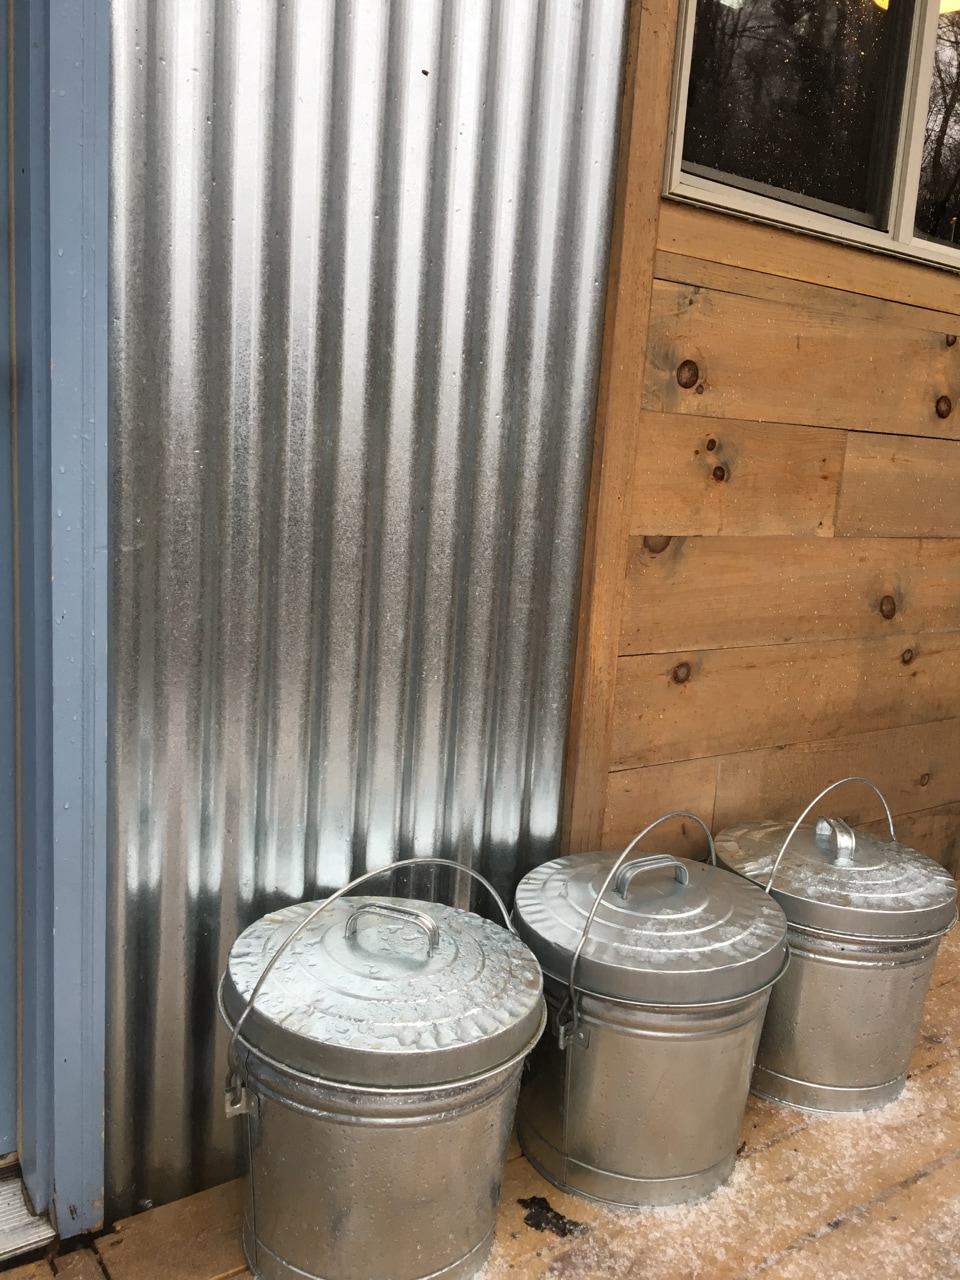
Store extra wood within arm's reach. Our woodbox under the stove holds enough wood for a few burns. We bought a 6-gallon galvanized trash can with a lid and a handle to store extra wood right outside the door. It's so handy, that we have three of them now. I like the look of them and love the convenience of having enough wood on hand to make it through more than a week's worth of cold.
Make fire-lighting easy. It's a pleasure to light up our stove, because we've figured out what works for us. We keep a pile of our driest fallen twigs in the woodbox. We also keep a box of fatwood split into tiny sections, plus Safe Lite fire starter squares. One square + two tiny sticks of fatwood + one handful of twigs + one lit match = instant fire. Plop a couple mini kiln-dried logs on top, and the fire's set for about an hour before it's time to add more wood.
Invest in kiln-dried wood. When we met Roger Lehet, inventor of our Kimberly, he told us that the wood stove would function best the drier our wood. We started out burning wood from our forest site, after letting it dry for a few months out of the weather. It was obviously too damp. Before too long, the stove wasn't burning well; so, Bill took off the top plate and saw the baffles at the top of the burn chamber were clogged. We switched to burning store-bought, kiln-dried wood and the stove has burned better ever since. When Bill took off the top plate this year, the baffles were still clean; no more build-up from unseasoned wood. Our current choice of wood: Hotsticks, sold around here at 7-11s. We cut the logs in thirds and then split the thickest logs to an ideal size for our stove. (They also sell "nuggets," which wouldn't have to be cut, but we haven't found them near us.)
Keep the stove pipe clean. Besides performing better, investing in kiln-dried wood is safer. Burning unseasoned wood is the number one cause of creosote buildup, which in turn is the number one cause of chimney fires. Cleaning our stove pipe was on our to-do list for a while, knowing that we had used unseasoned wood for much of last winter's burns. When we finally got around to buying a stove brush, we were shocked to see how much creosote had built up in the stove pipe. Hopefully, we'll never see that much again, now that we're using seasoned wood, but it was a good reminder that regardless of what wood we burn, we need to regularly brush out the stove pipe. It's not even a tough or time-consuming job. To reach the full length of our pipe, we bought two Gardus SootEater Rotary Pellet Stove cleaners.
Brace the pipe. Last year's dump of three feet of snow bent our stove pipe above the roof. Inside the house, the pipe disconnected from the stove and water dripped in. We had to wait till the snow melted to straighten out the pipe and resume firing up the stove. So, this year, before any snowstorms, Bill added a rooftop brace to the pipe. (We used a Selkirk 6-inch stainless steel roof brace kit.) He also doubled up the boot that shields the hole cut through our roof. (We used a high-temp model from Pipe Boot Express, and Bill coated it with Flex Seal.)
Store extra wood within arm's reach. Our woodbox under the stove holds enough wood for a few burns. We bought a 6-gallon galvanized trash can with a lid and a handle to store extra wood right outside the door. It's so handy, that we have three of them now. I like the look of them and love the convenience of having enough wood on hand to make it through more than a week's worth of cold.
Make fire-lighting easy. It's a pleasure to light up our stove, because we've figured out what works for us. We keep a pile of our driest fallen twigs in the woodbox. We also keep a box of fatwood split into tiny sections, plus Safe Lite fire starter squares. One square + two tiny sticks of fatwood + one handful of twigs + one lit match = instant fire. Plop a couple mini kiln-dried logs on top, and the fire's set for about an hour before it's time to add more wood.


 RSS Feed
